HiBob
Install HiBob integration
The HiBob integration can be found here. Please install it in your environments before proceeding with the steps below.
Connecting a HiBob account
-
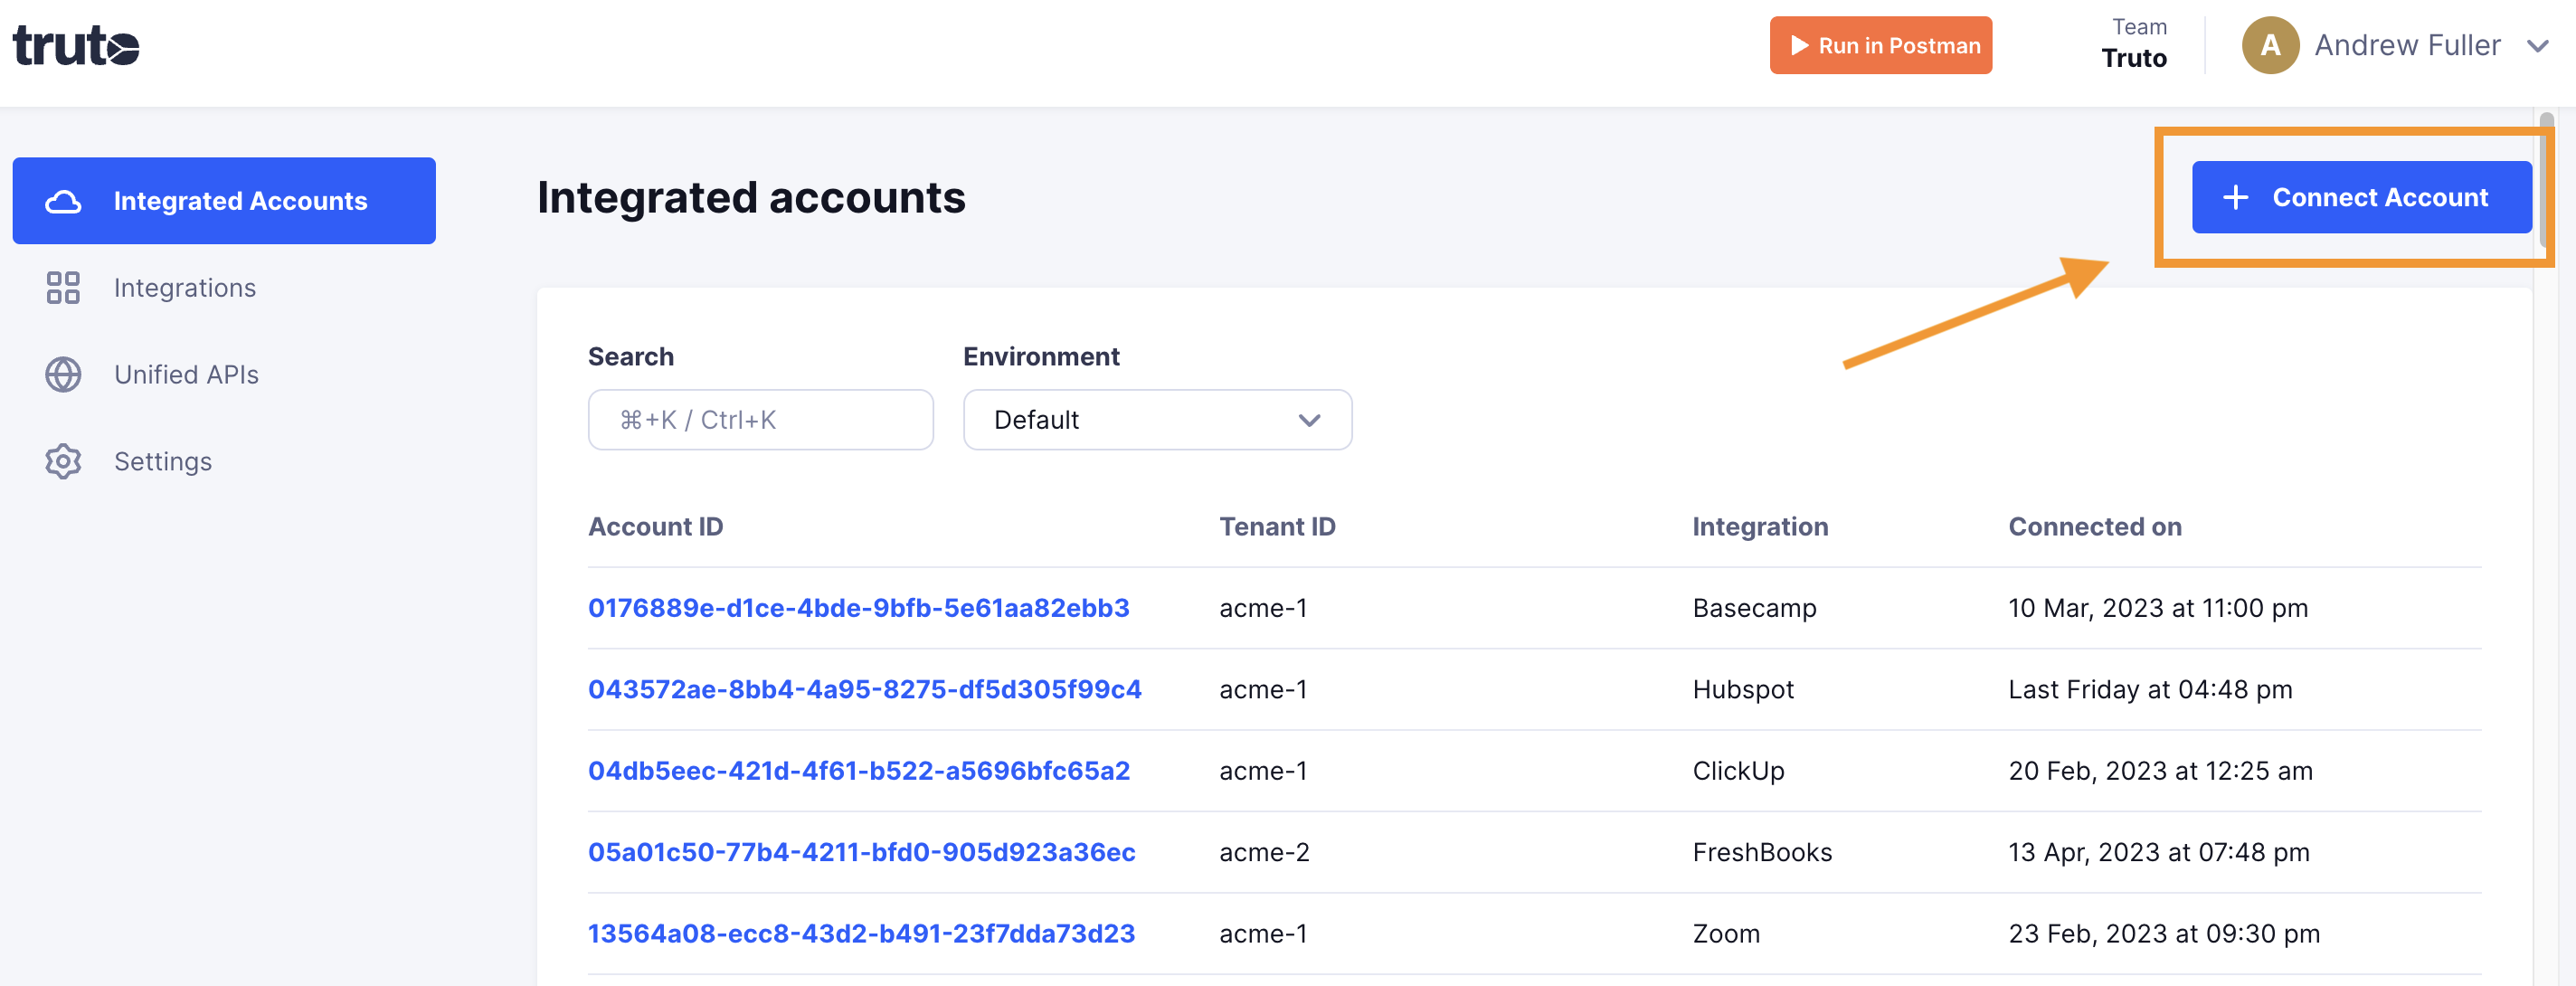
Click on Connect Account
-
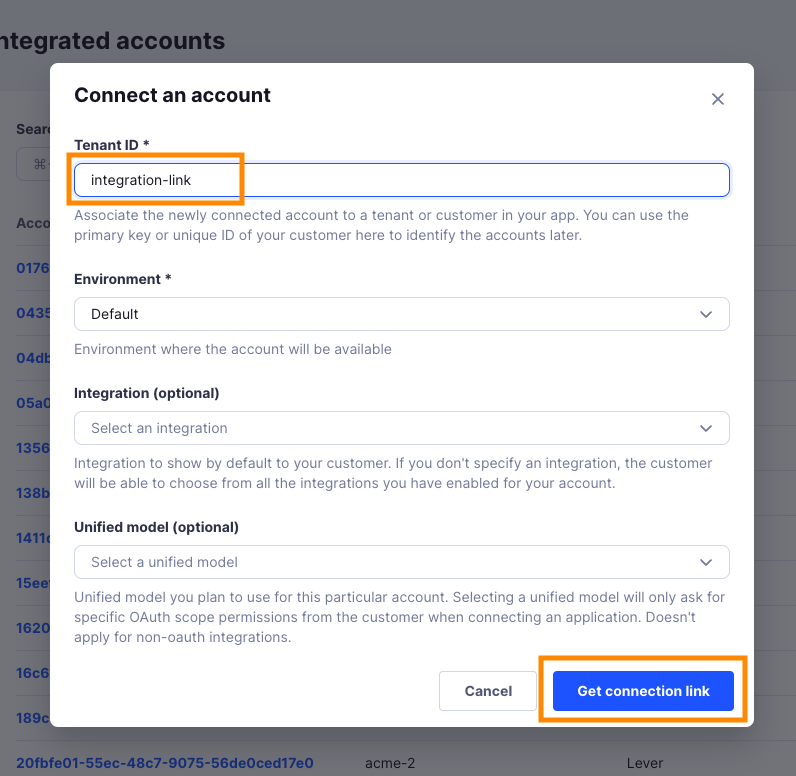
Type in a value for the Tenant ID. This can be any ID of your choosing. And then click on Get connection link
-
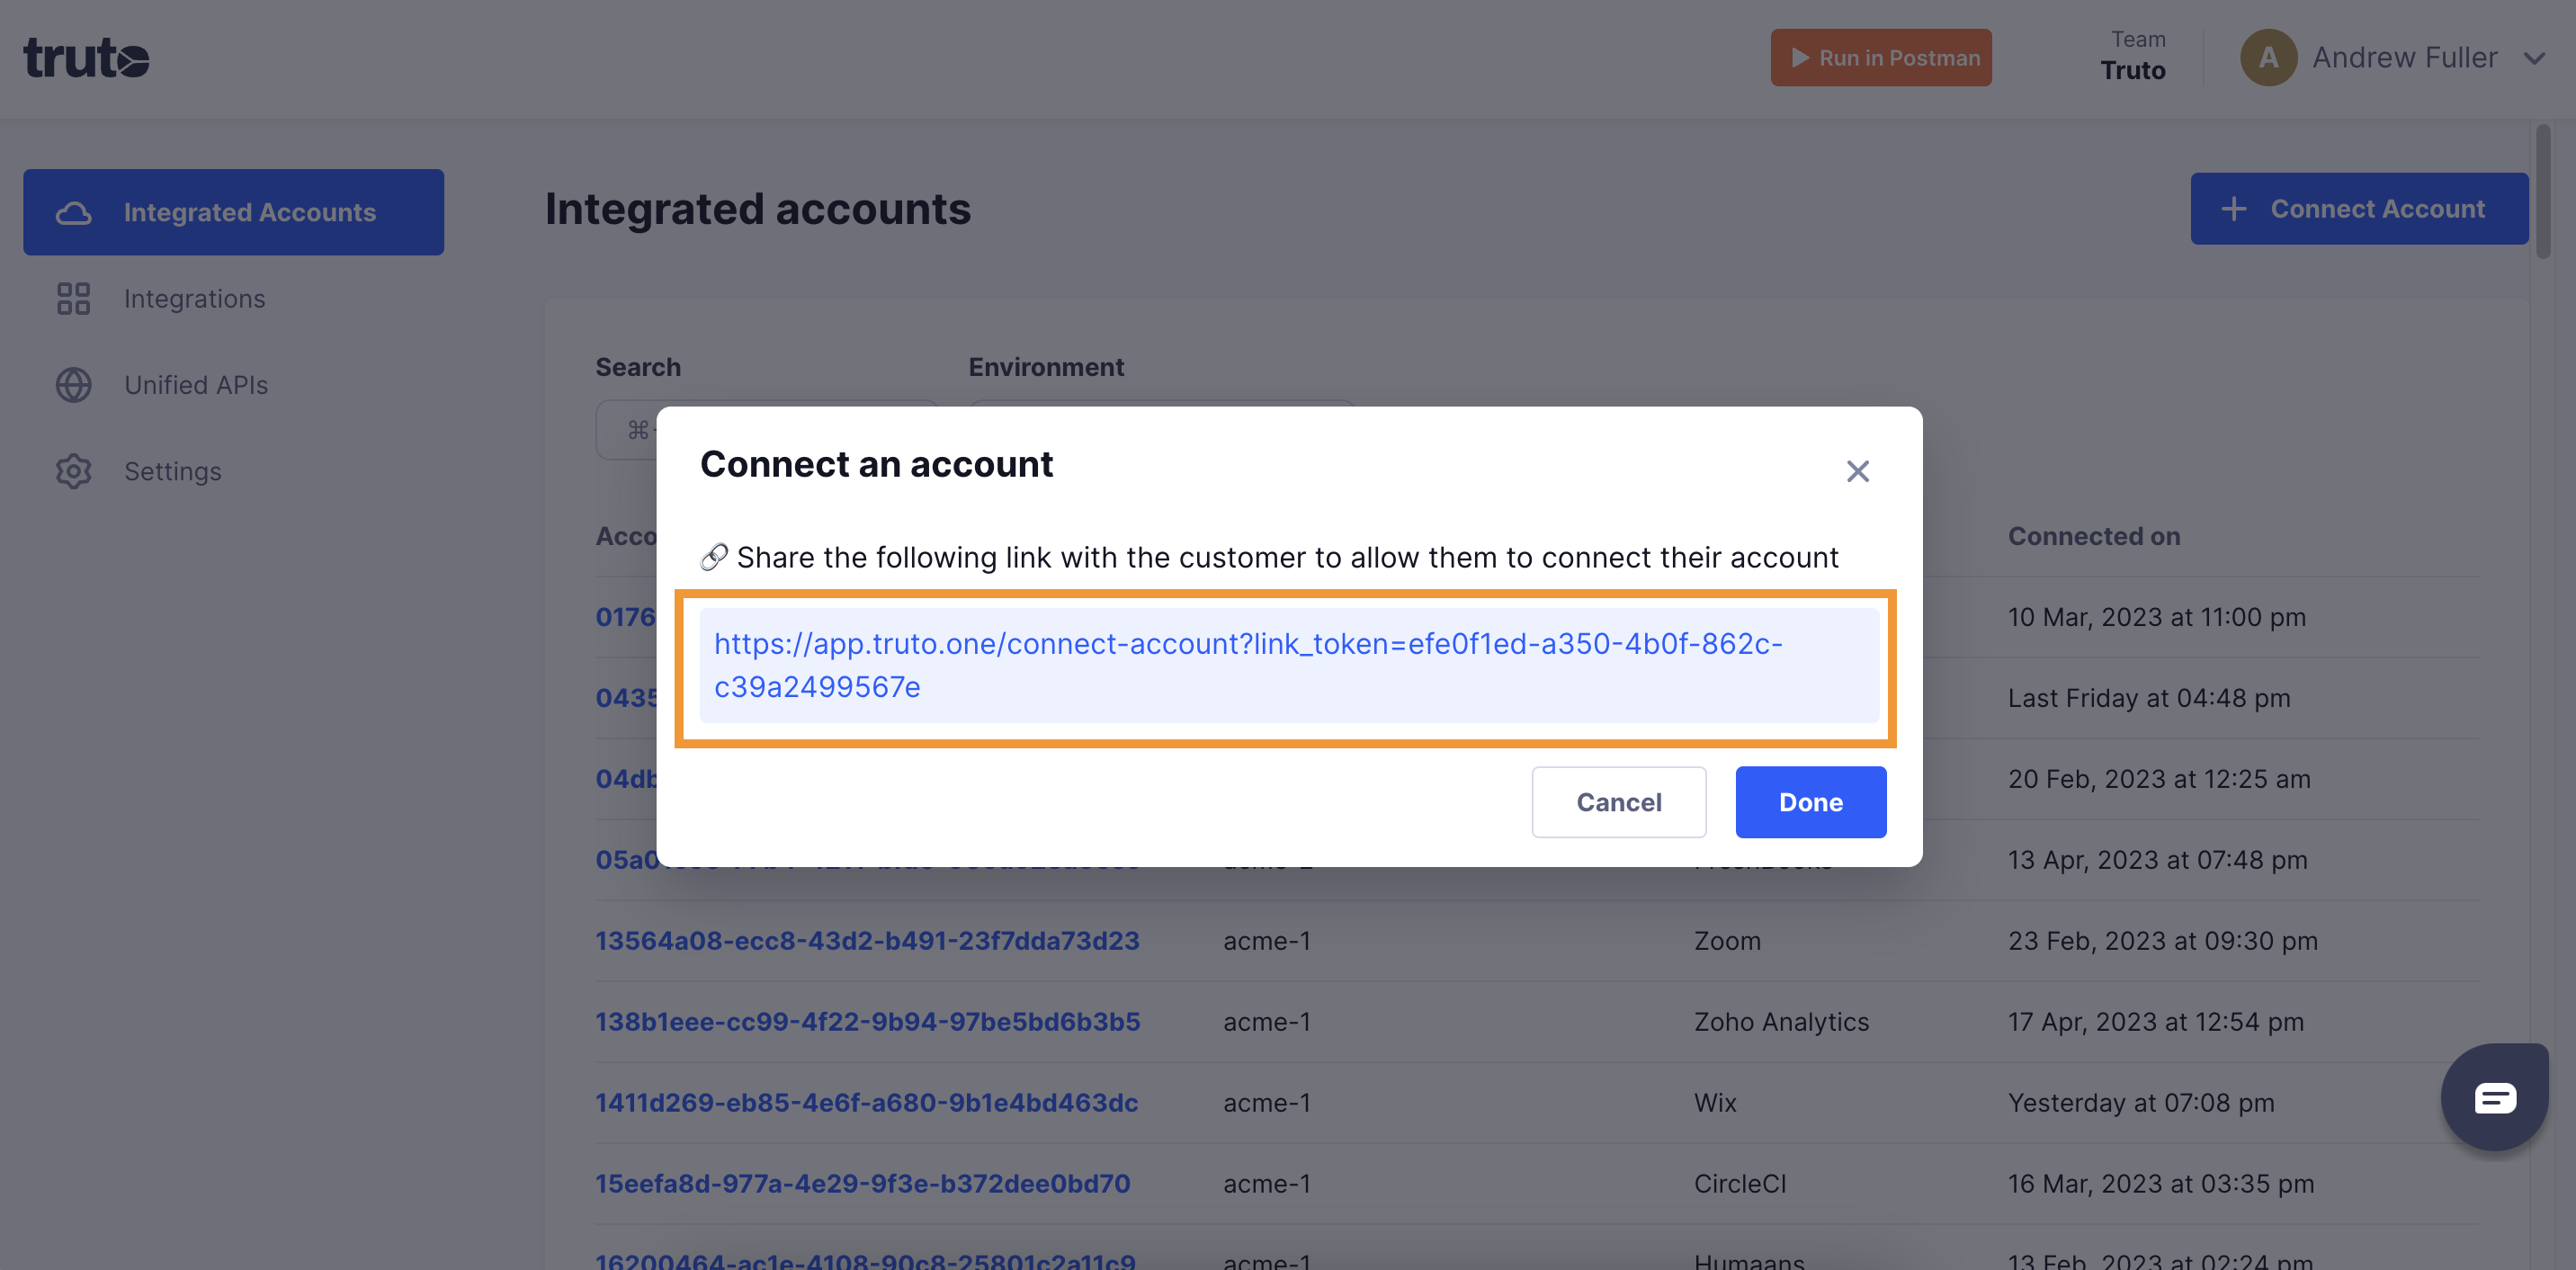
A new link will be generated. Clicking on the link will open a new tab with the list of integrations. You can share this link with your customers too, and they will be able to connect their HiBob account.
-
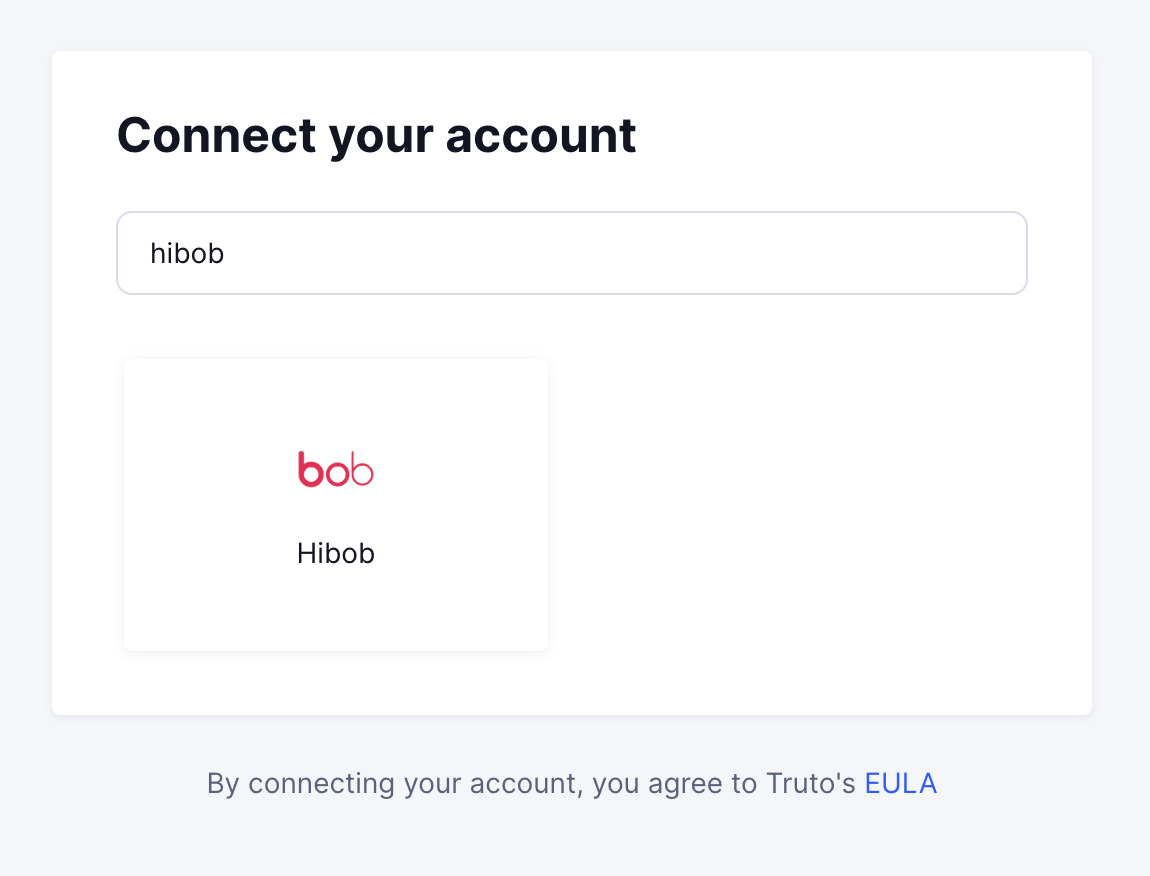
Select HiBob
-
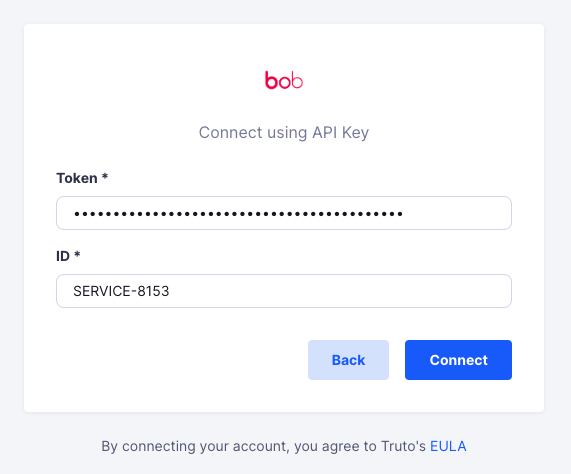
You'll now be asked for your HiBob API Token and ID.
Generating HiBob Token and ID
Warning
You need to be an Administrator to follow the steps below
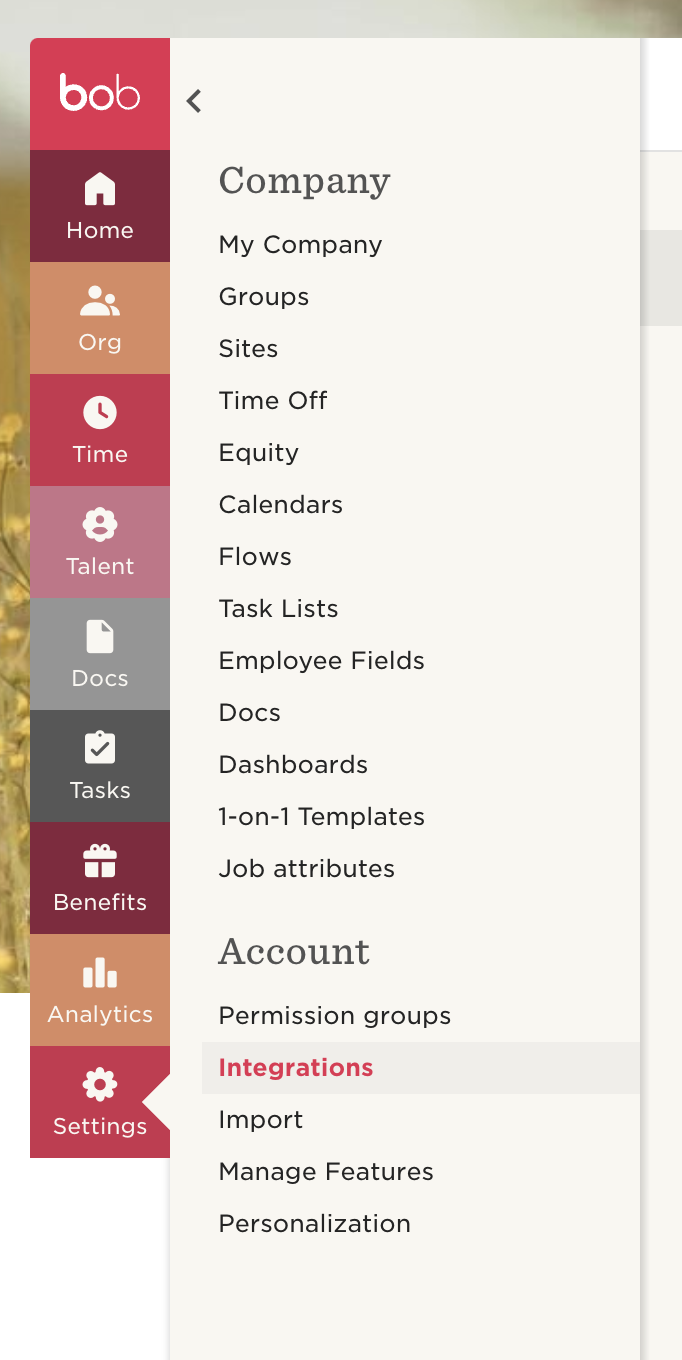
- Login to your HiBob account and click Settings on the sidebar, and then click Integrations under the Account section.
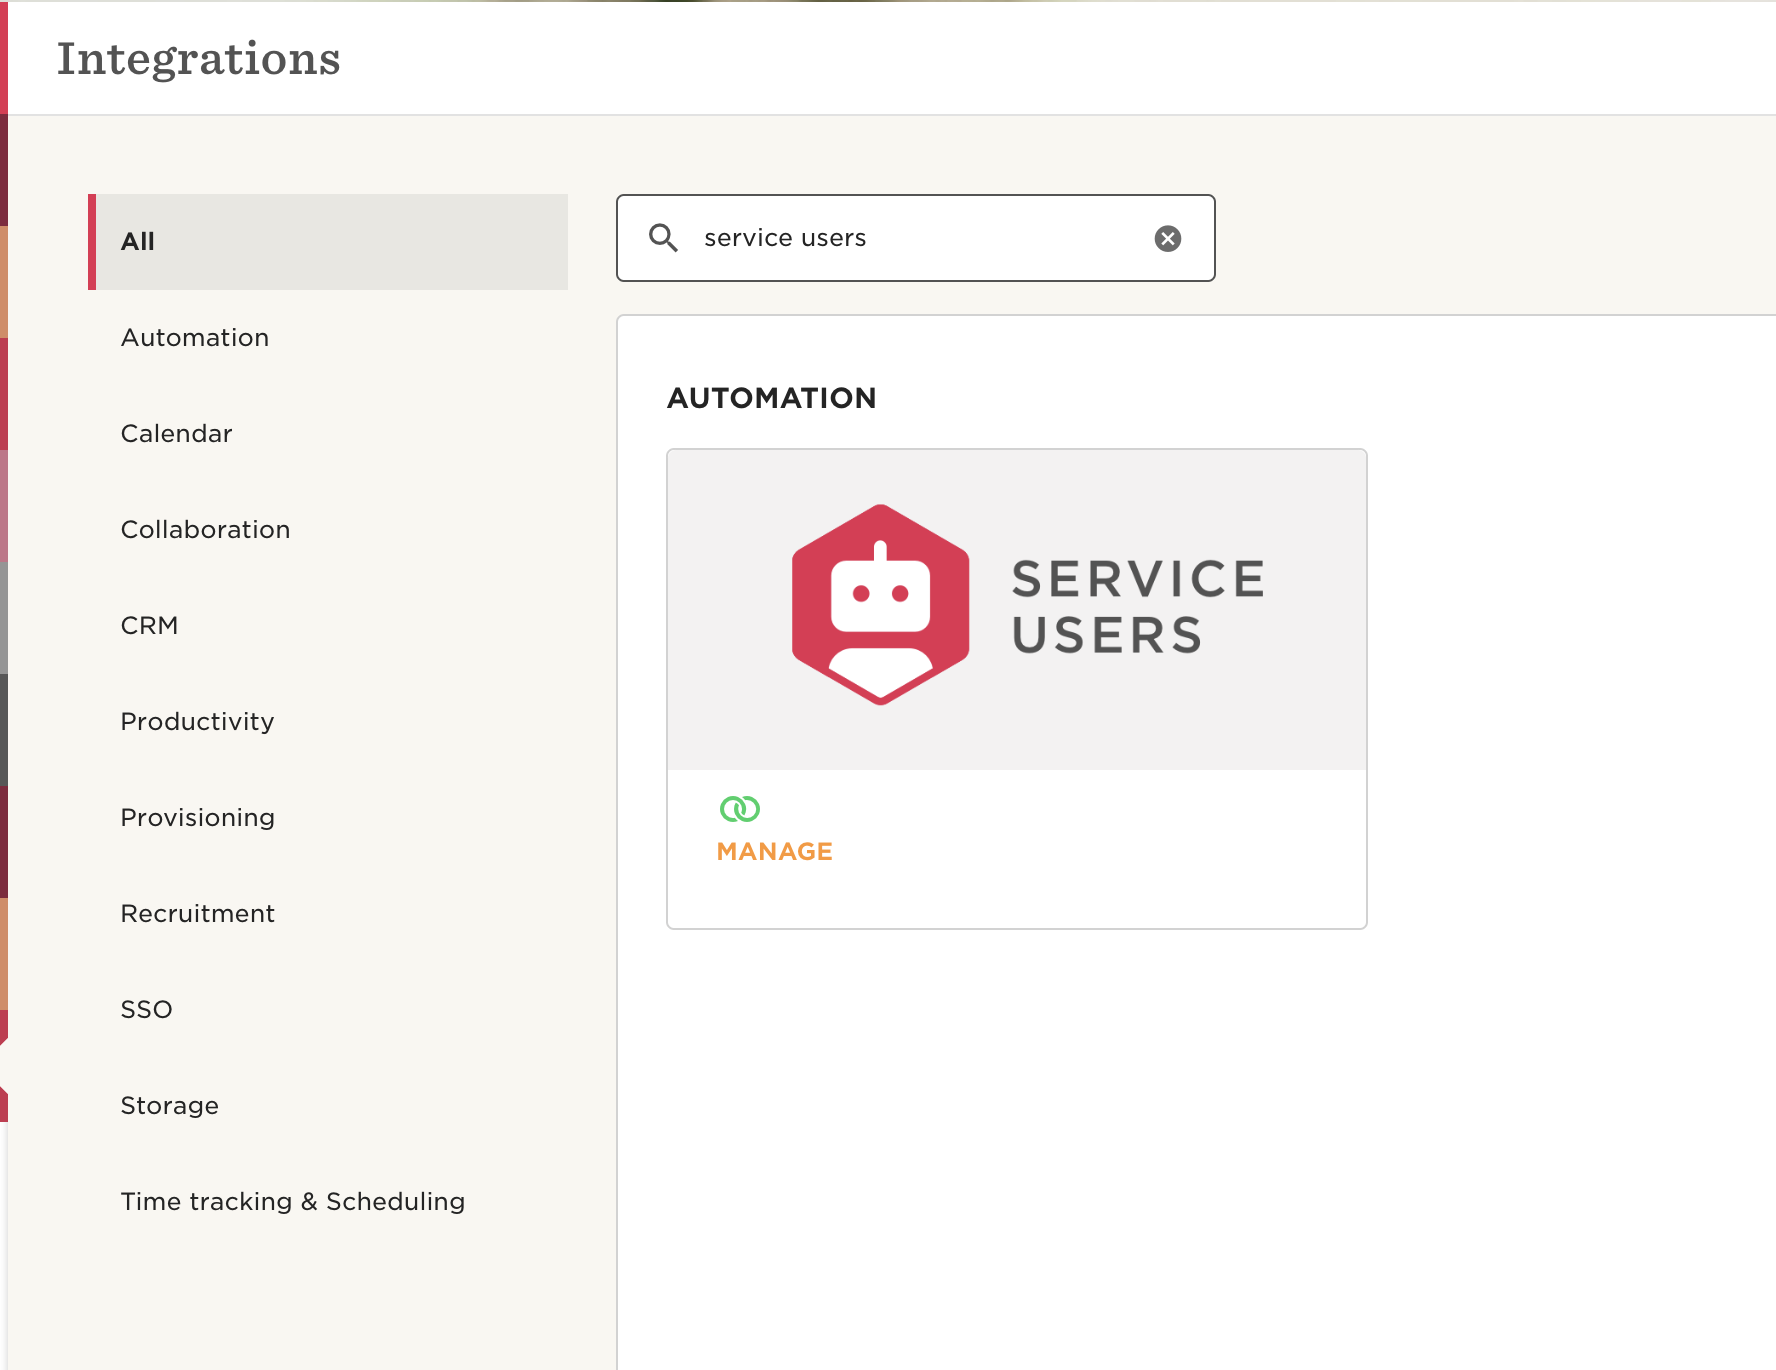
- Search for "service users" and click on Manage.
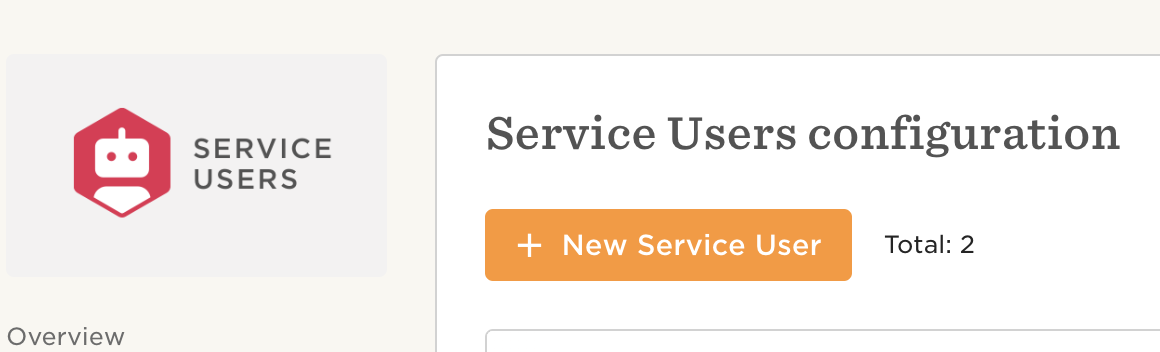
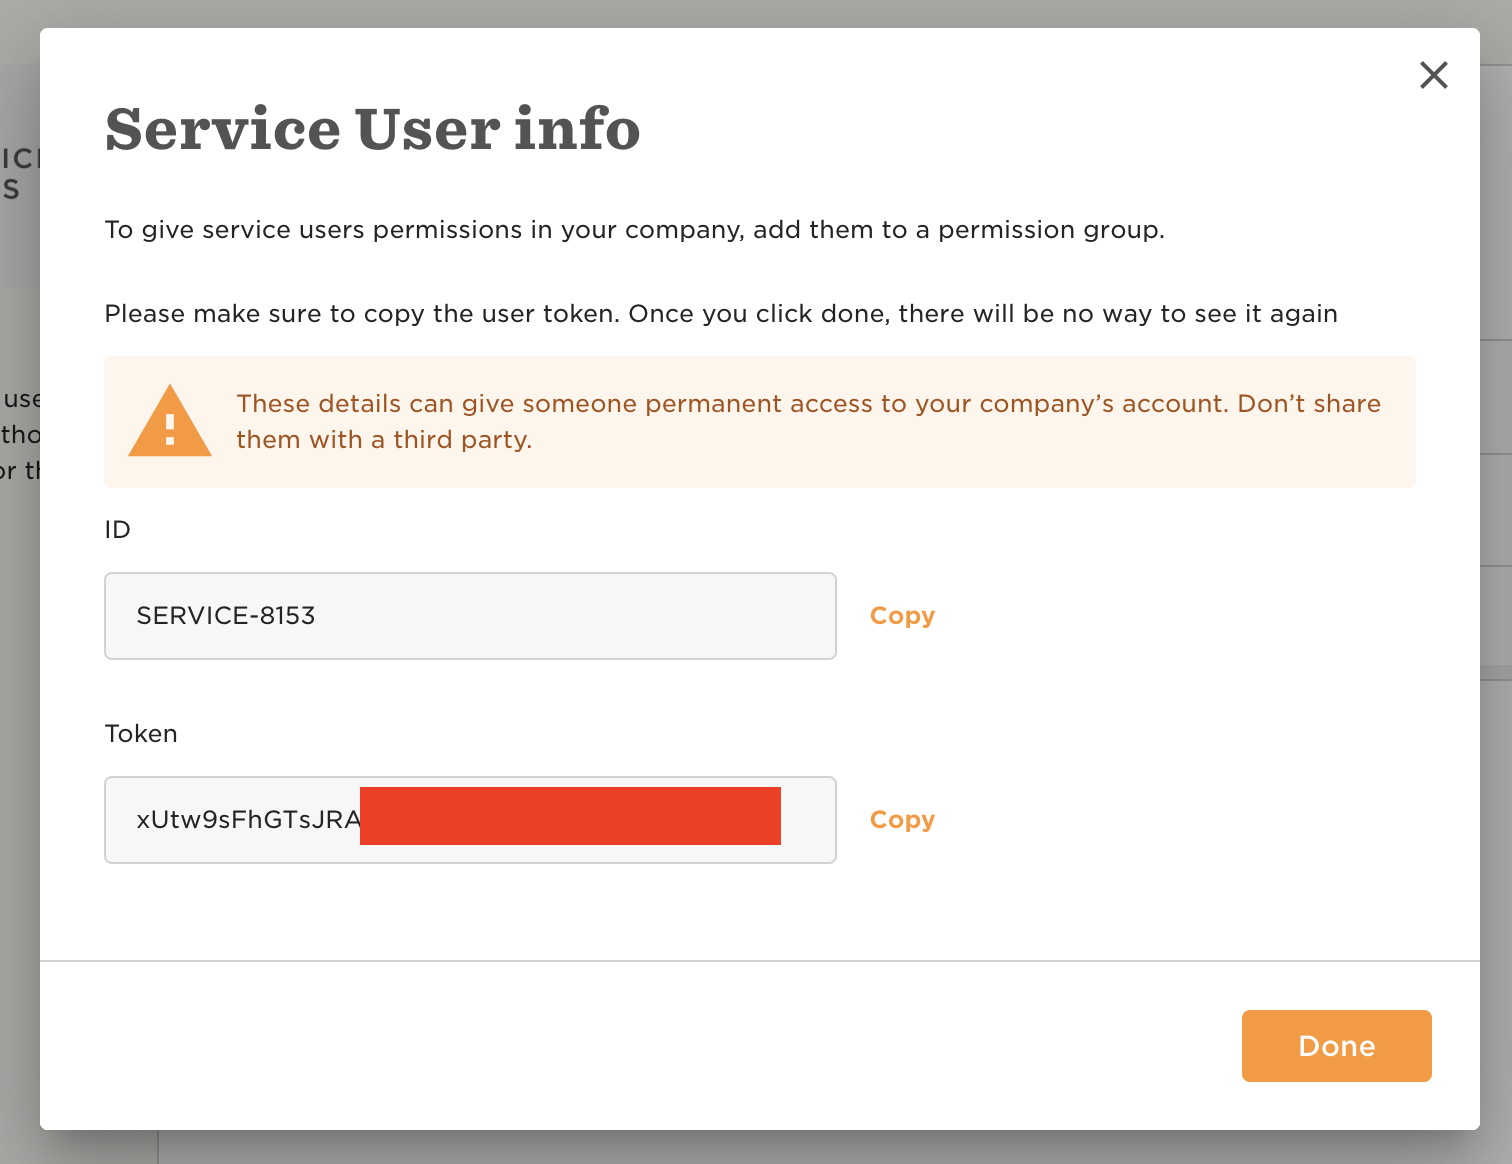
- Click on New Service User.
- Enter the Service User Name and Display Name. Click Next.
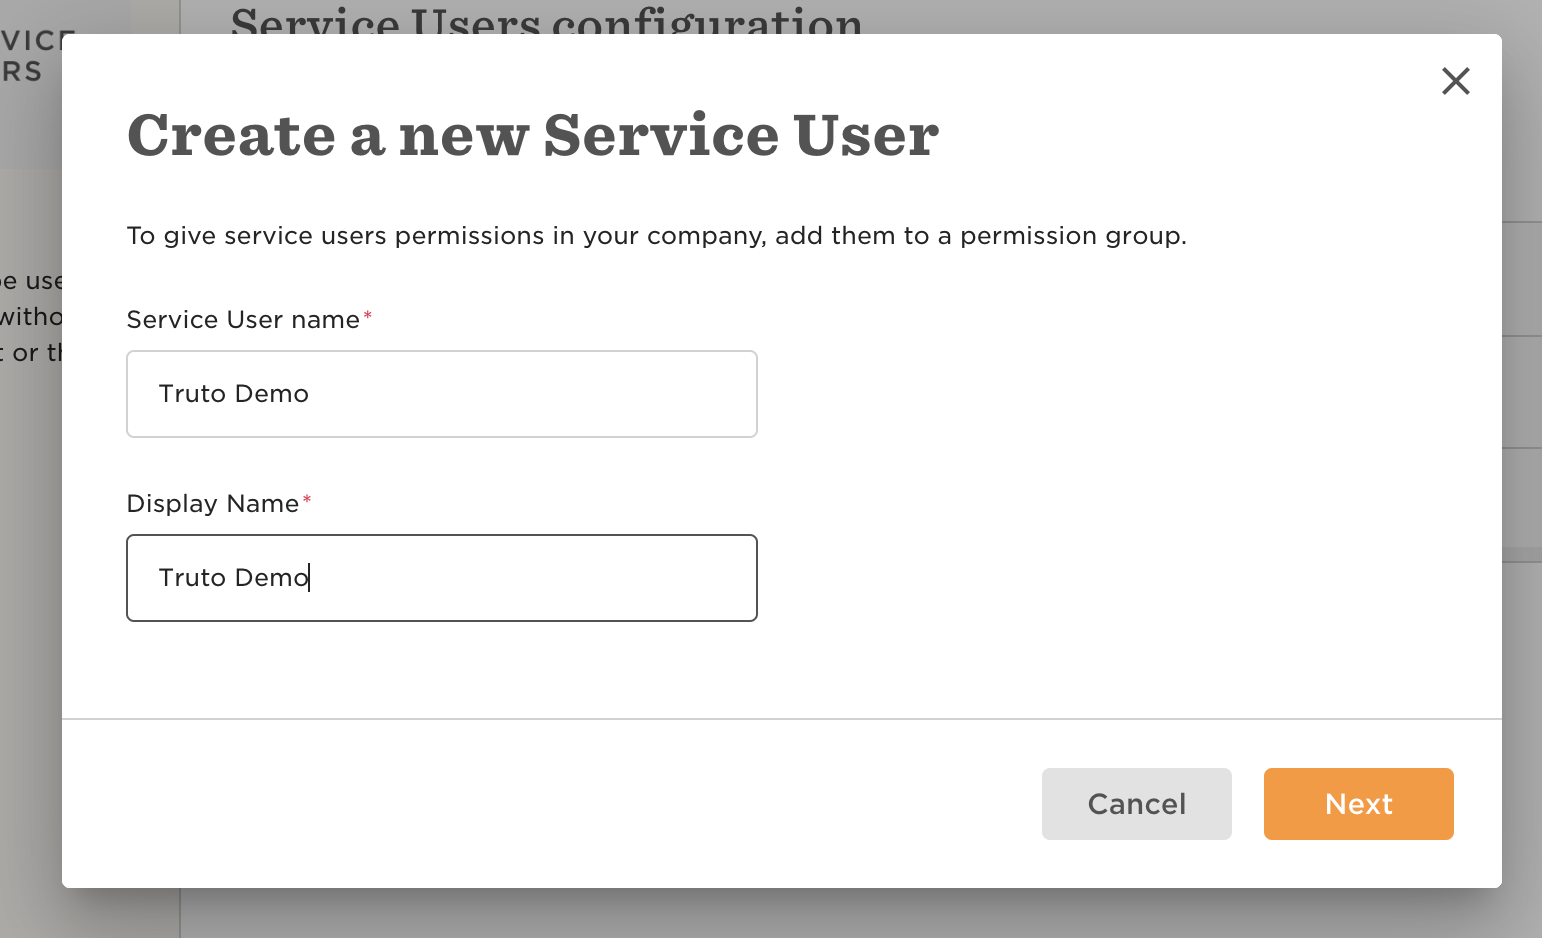
- Copy the ID and Token to be entered into Truto interface later.
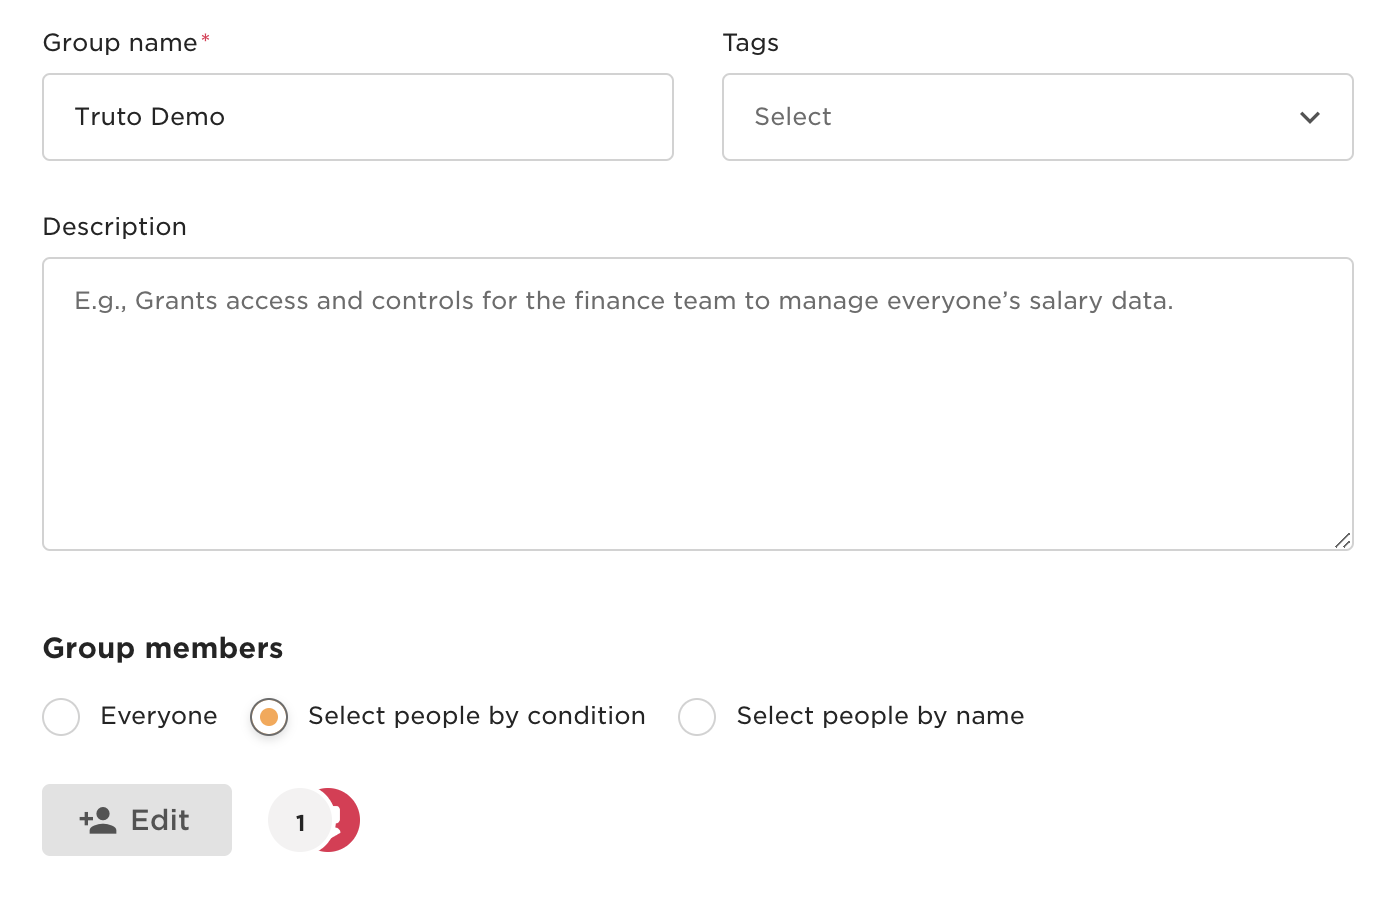
- Go to Permission Groups in HiBob and click on Create Group.

- Enter a Group Name and choose Select people by condition in the Group members section. Click on Edit.
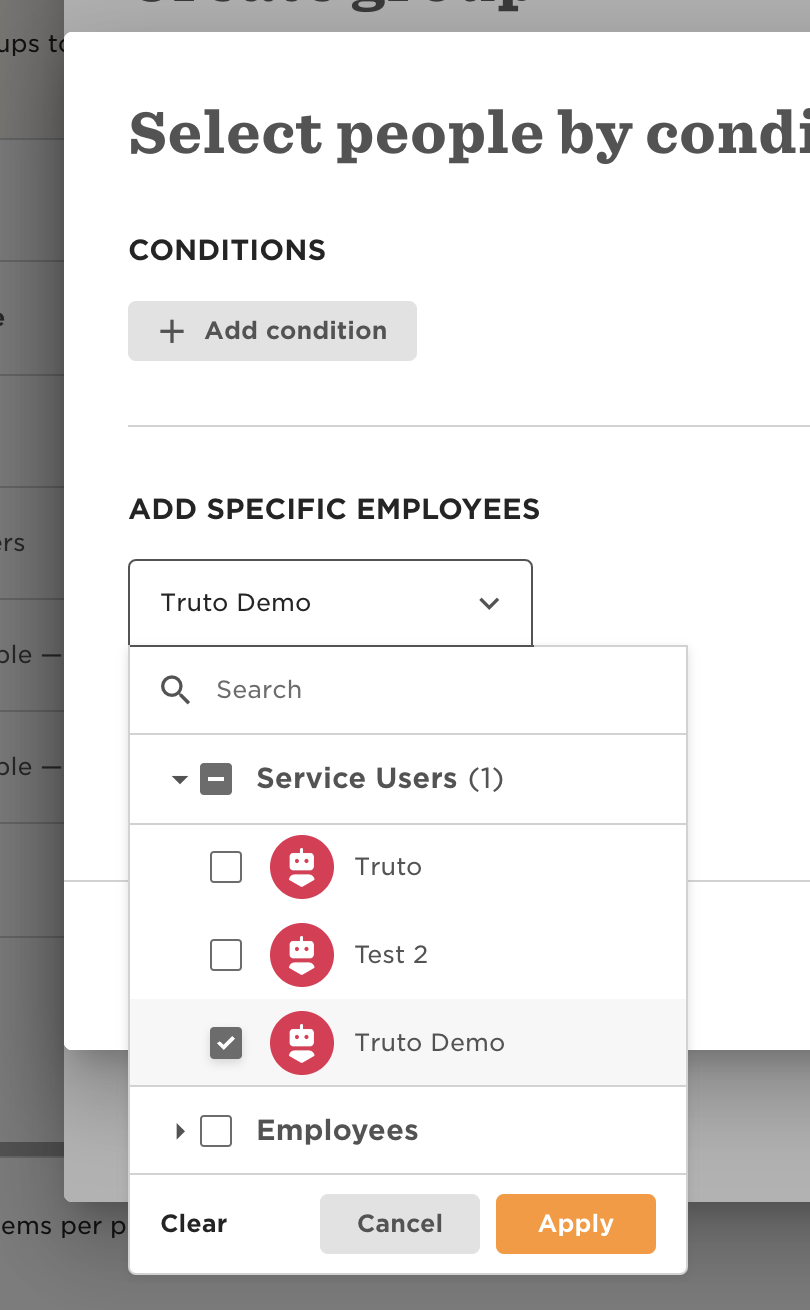
- Remove any conditions if present, and select the Service User you created in Step 4 by clicking the Add Specific Employees dropdown. Click Apply and then Click Create.
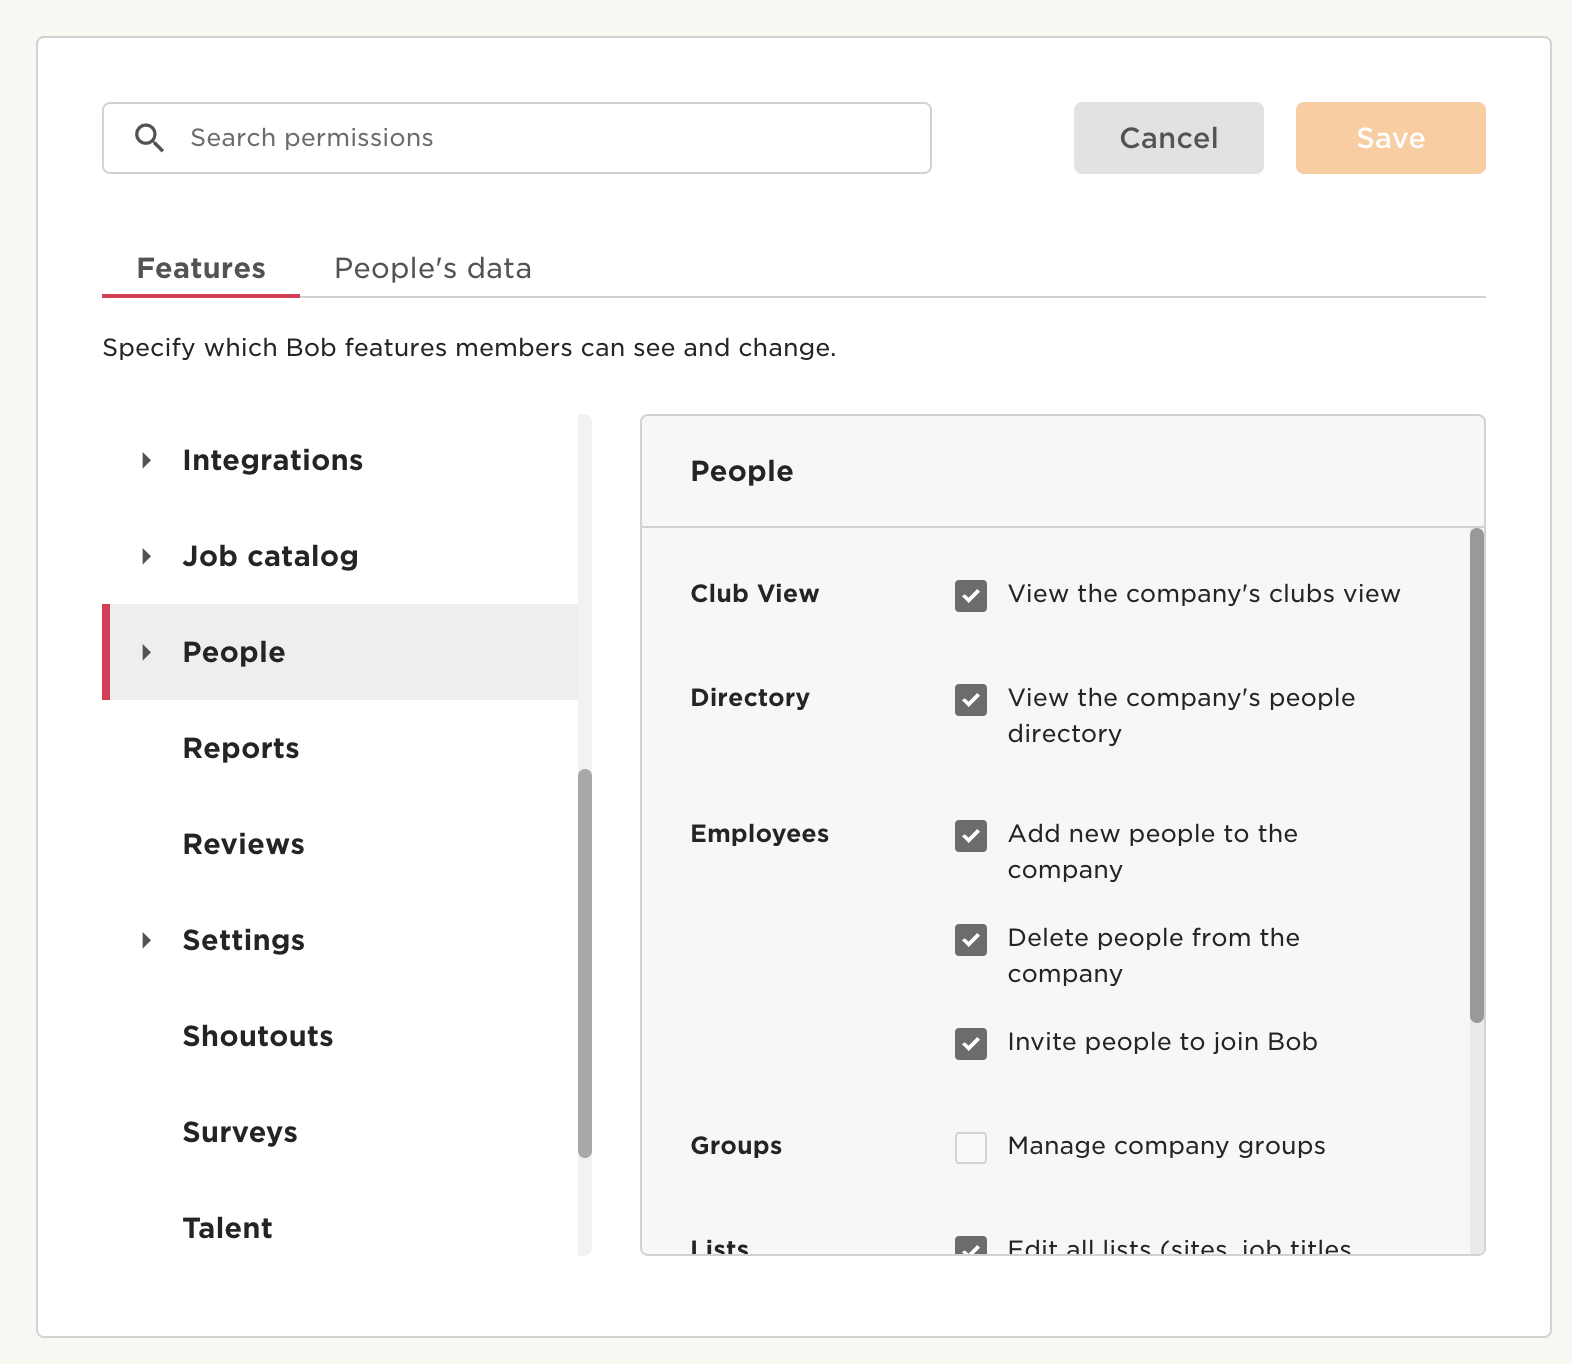
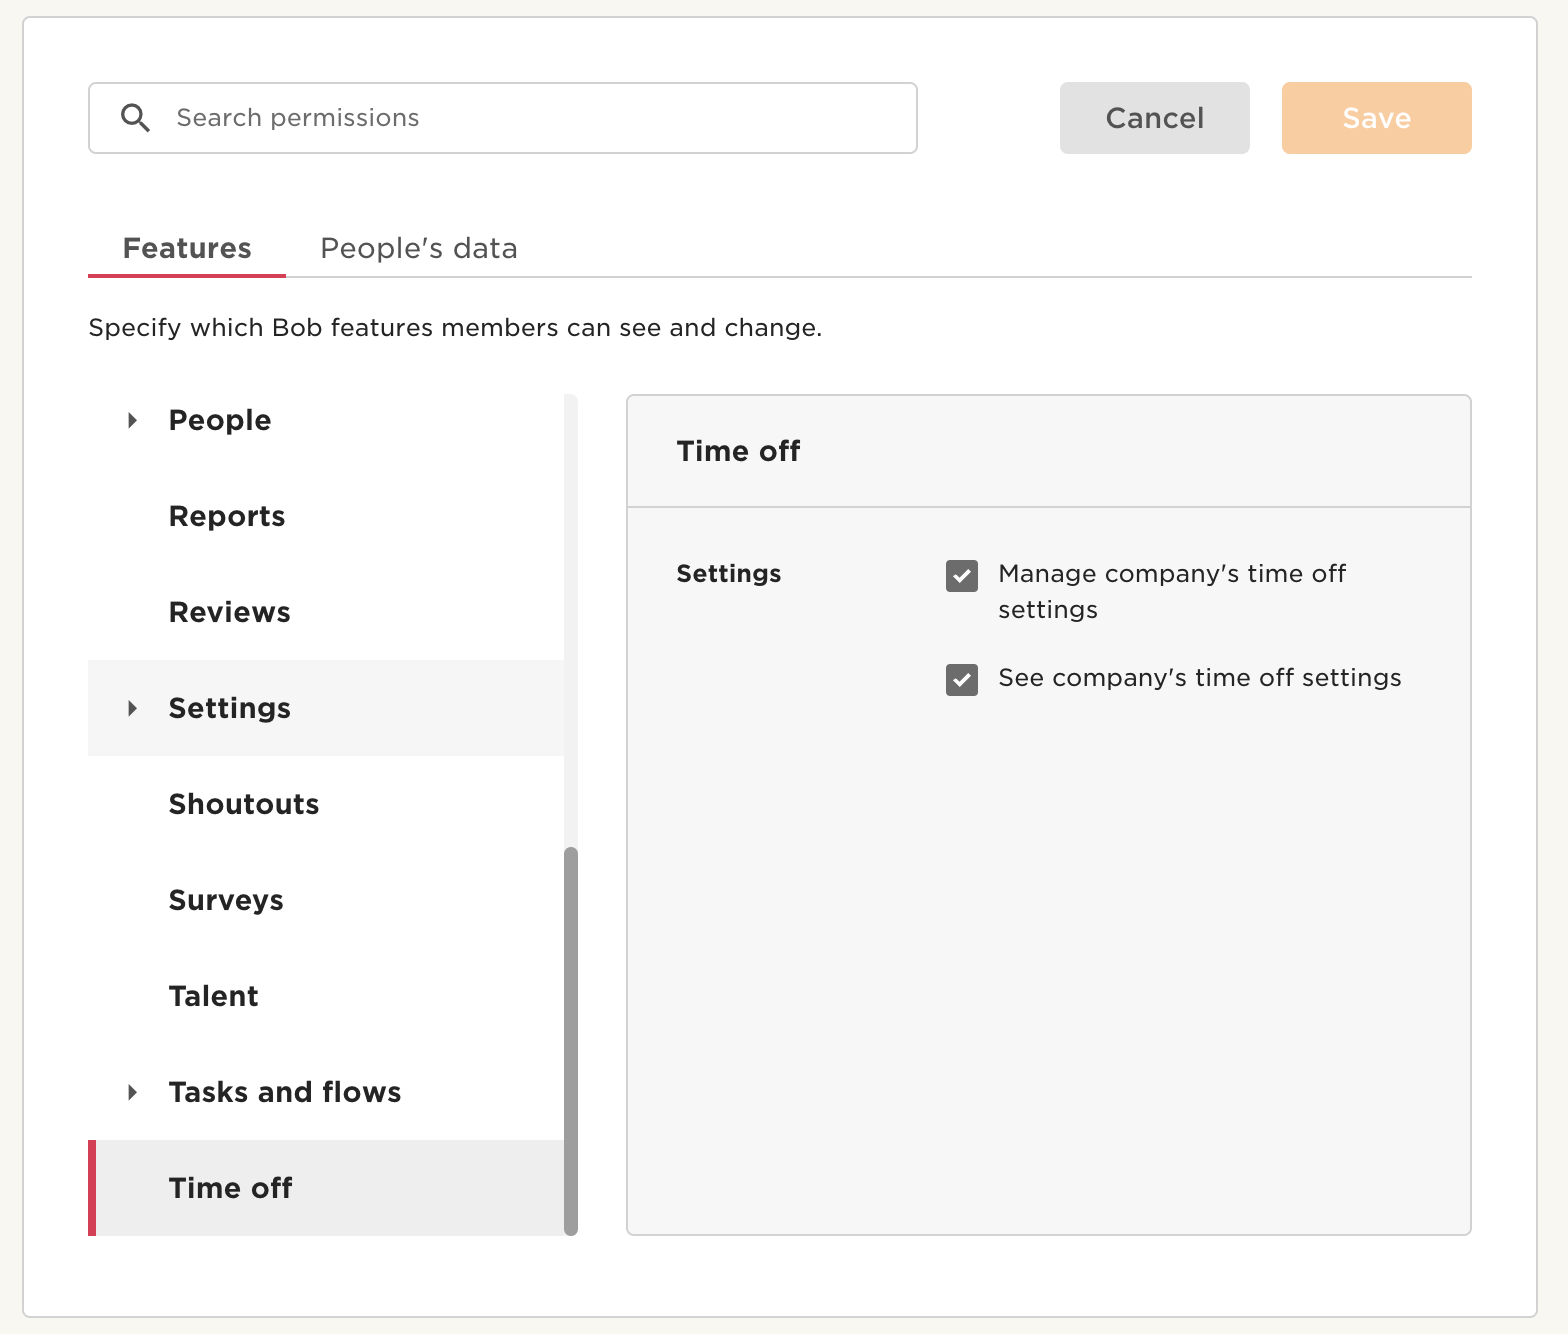
- You'll be taken to the Group details page. Click Edit permissions and then select all permissions from People and Timeoff category in the Features tab.
- Then move on to People's data tab and click Edit.
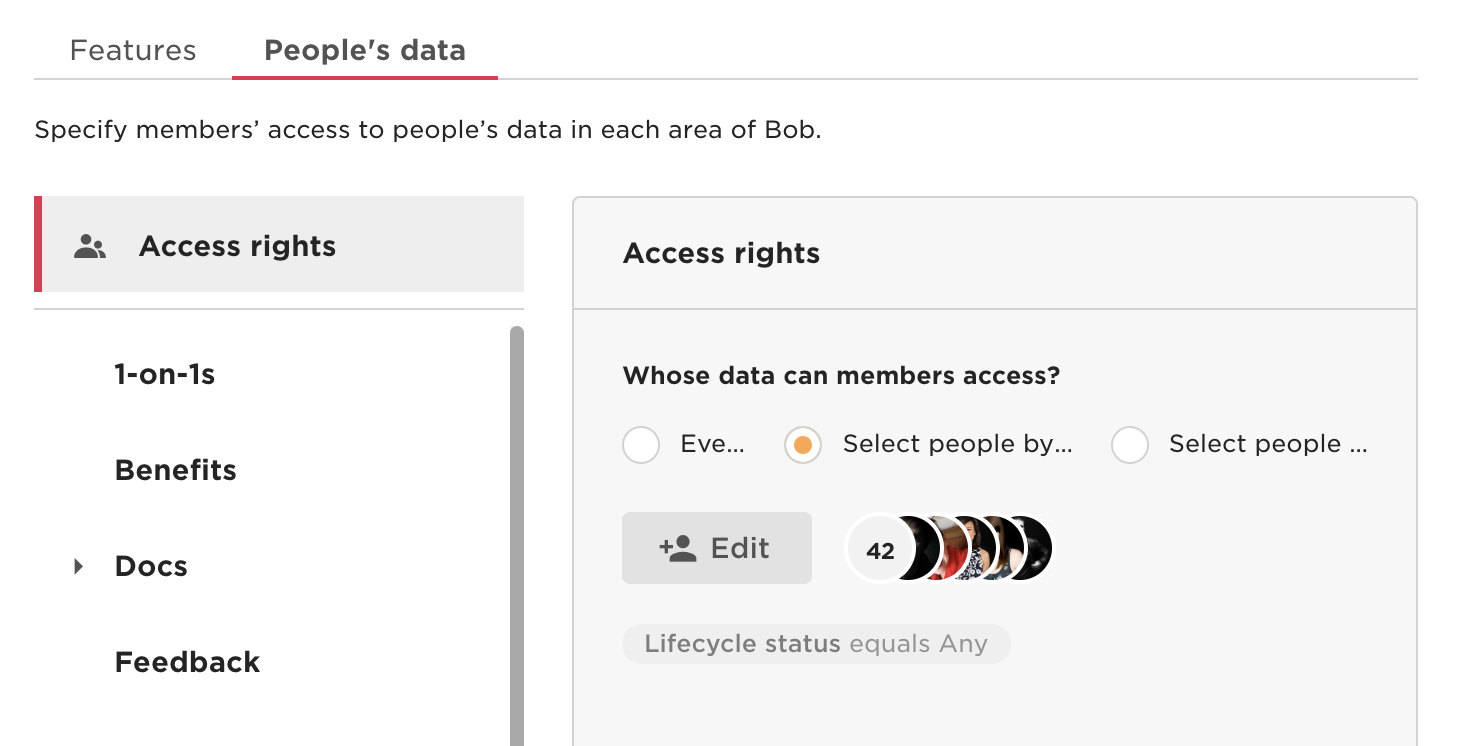
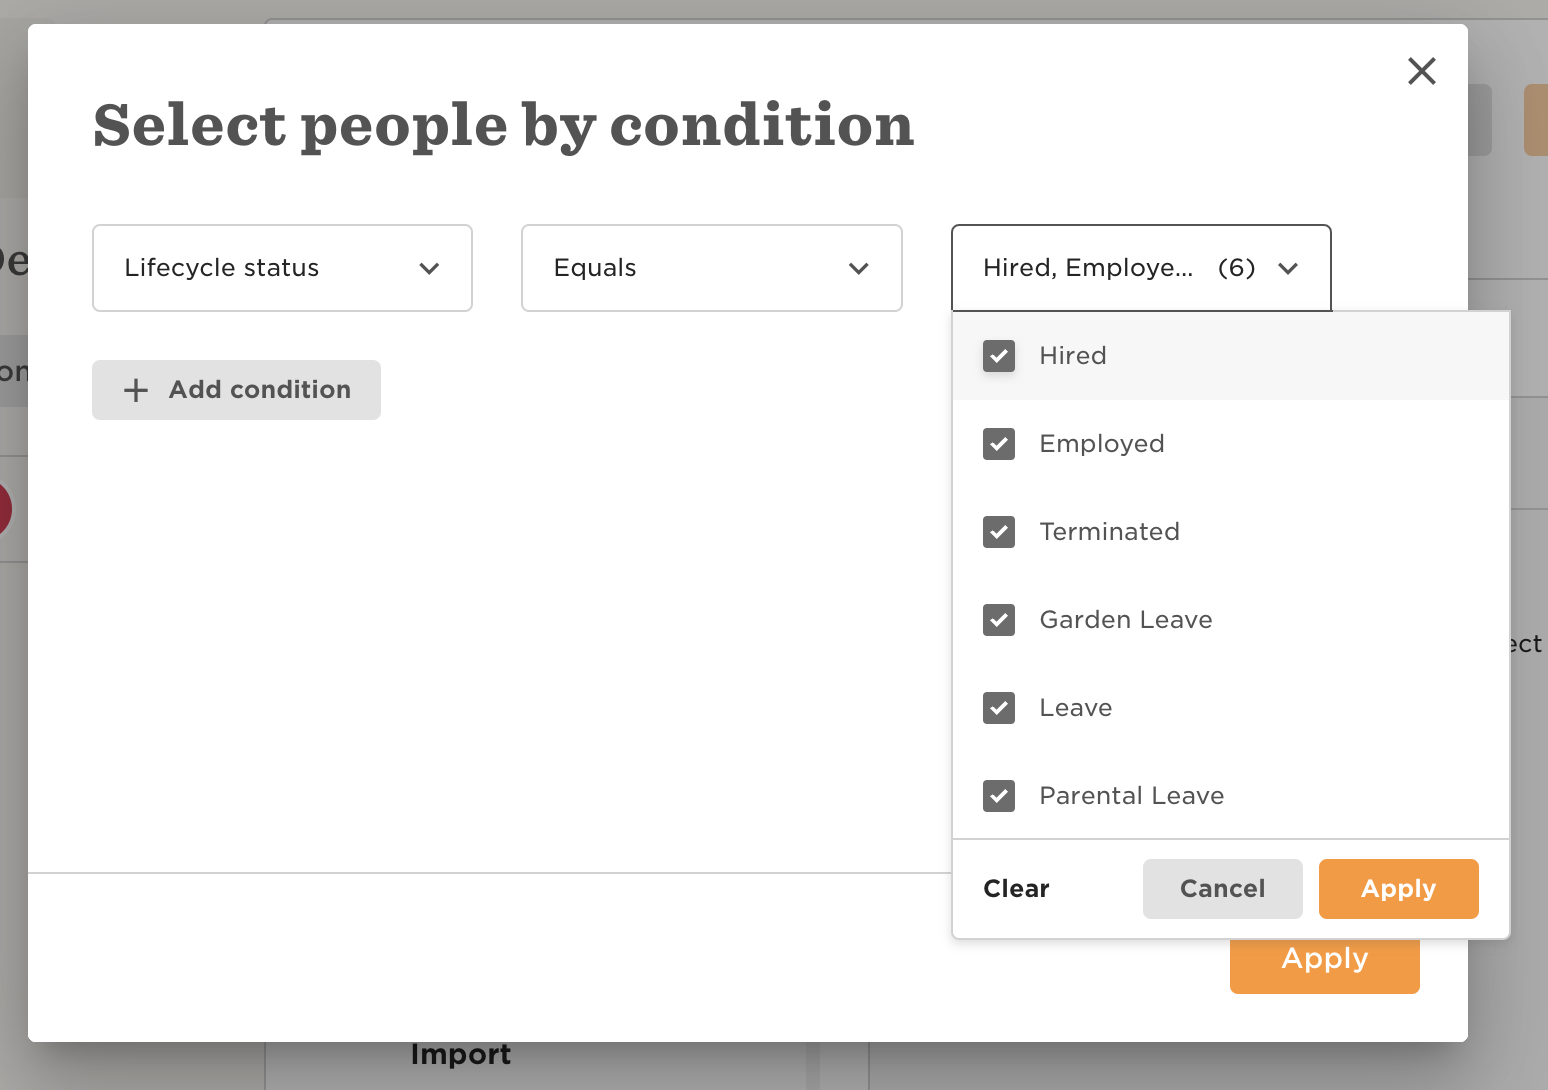
- Select all the Lifecycle statuses and click Apply.
- Click Save to save the permission changes.
- Now go back to the Truto Link interface and enter in the ID and Token you copied from step 5.
- Voila! You should now see a connection successful message. You can now close this tab.
Go to your Truto account, and you should see the new HiBob integration under Integrated Accounts. Click on the Account ID to view the details and initiate API calls.