Zoho BugTracker
Zoho BugTracker connects with OAuth 2.0 through Zoho accounts. The end user picks the data center their account is in, then signs in.
Install the Zoho BugTracker integration
Install Zoho BugTracker from Available integrations in each environment you connect accounts from.
Use your own Zoho BugTracker OAuth app (optional)
Truto ships a Zoho BugTracker OAuth app, so OAuth 2.0 works without any setup. To show your own app on the consent screen instead, register a client in the Zoho API Console, register the redirect URL below, and set the app's Client ID and Client Secret on the installed integration. See Overriding OAuth credentials.
https://api.truto.one/connect/zohobugtracker/callbackBy default, Truto asks Zoho BugTracker for these scopes. The connect screen lists them under Permissions required, and you can change them when you override the OAuth credentials.
ZohoBugTracker.users.READZohoBugTracker.portals.READZohoBugTracker.projects.READ
Find your data center
The data center is the domain ending in the Zoho BugTracker URL in your browser.

Connect a Zoho BugTracker account
-
Click Connect Account.
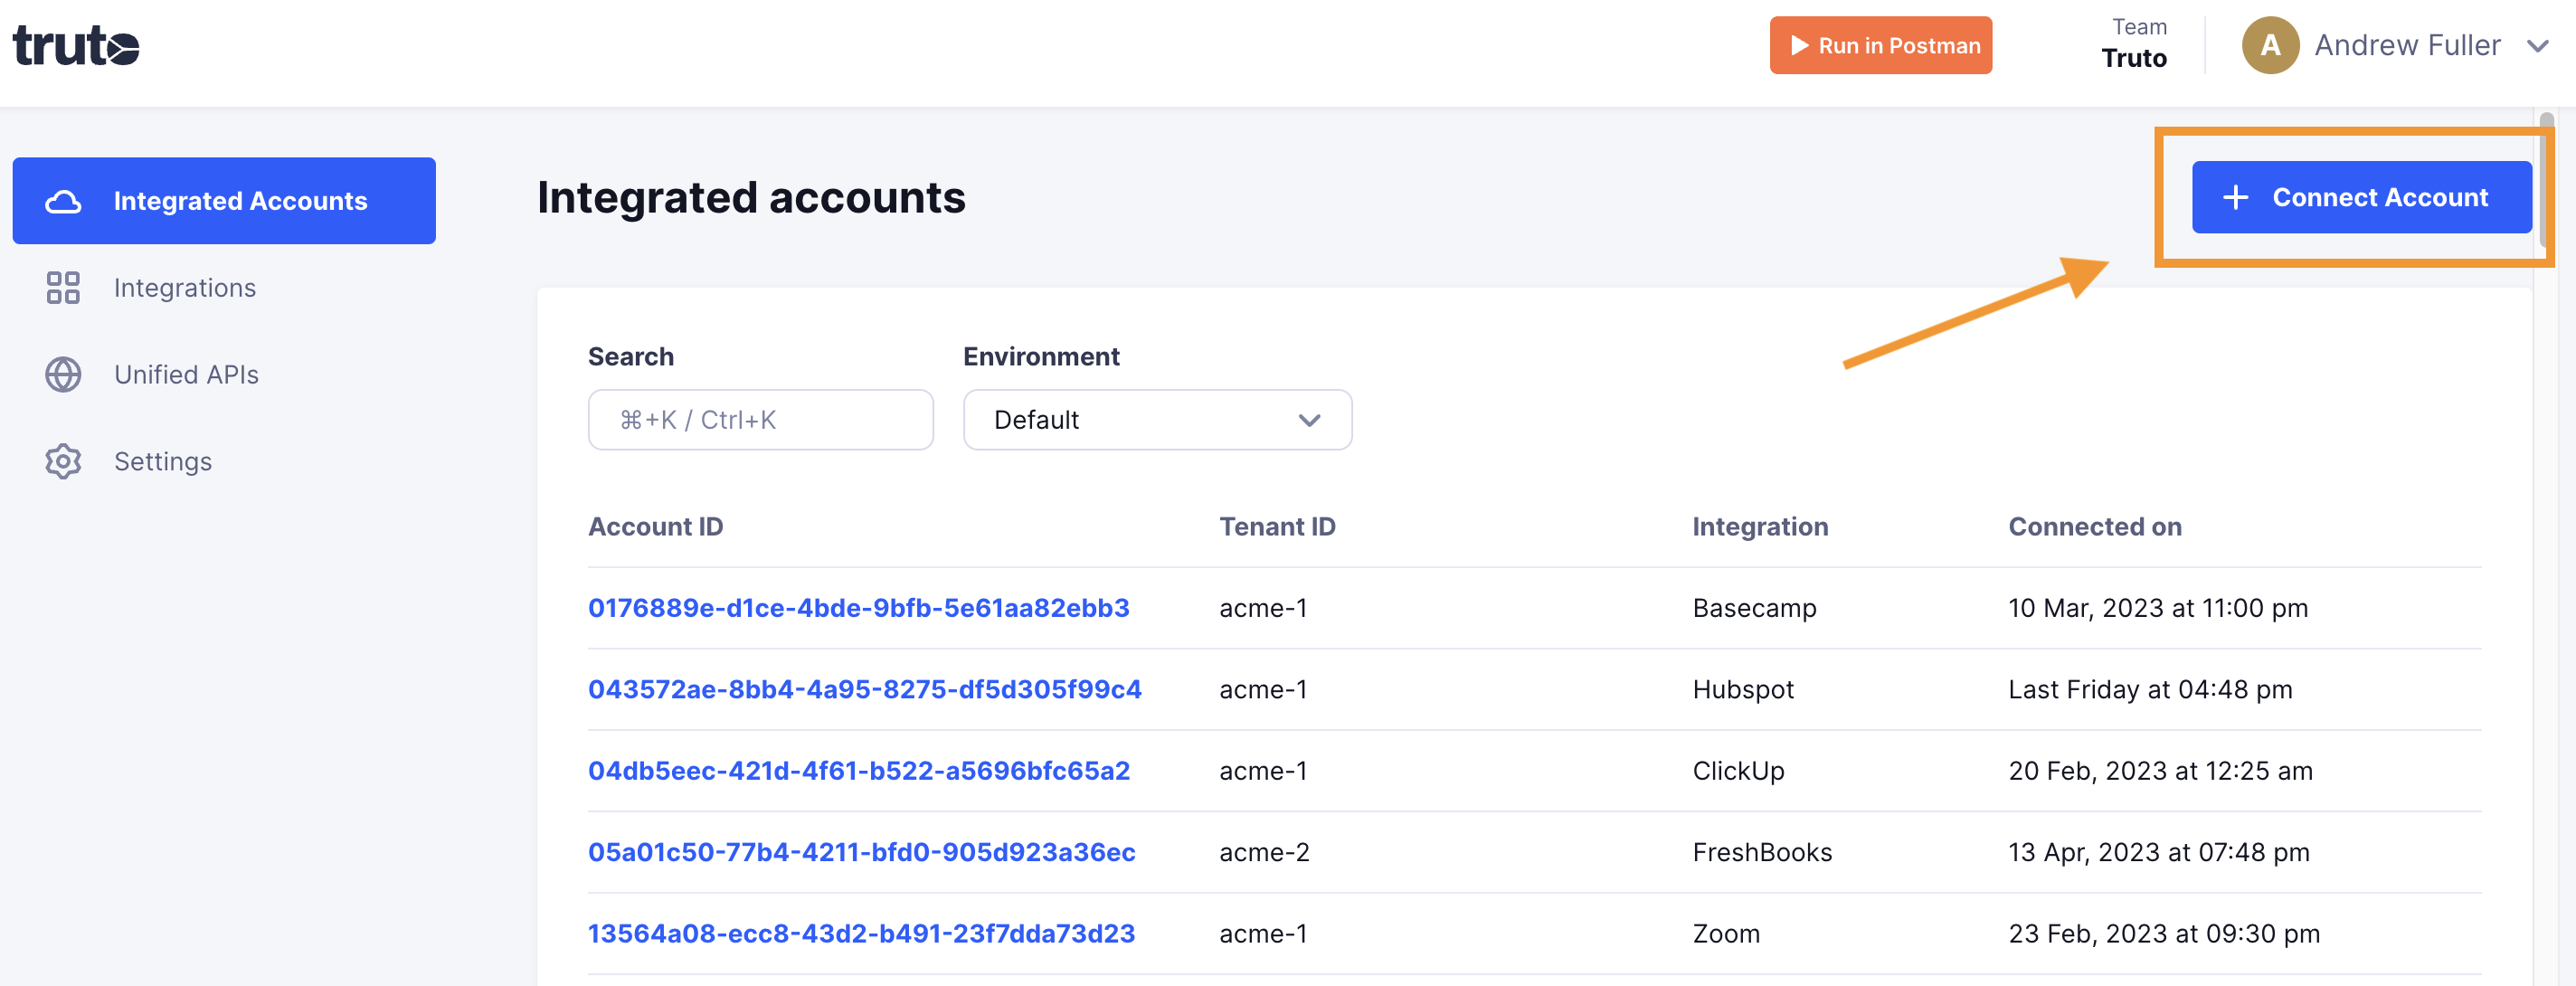
-
Enter a Tenant ID. This can be any ID you choose. Click Get connection link.
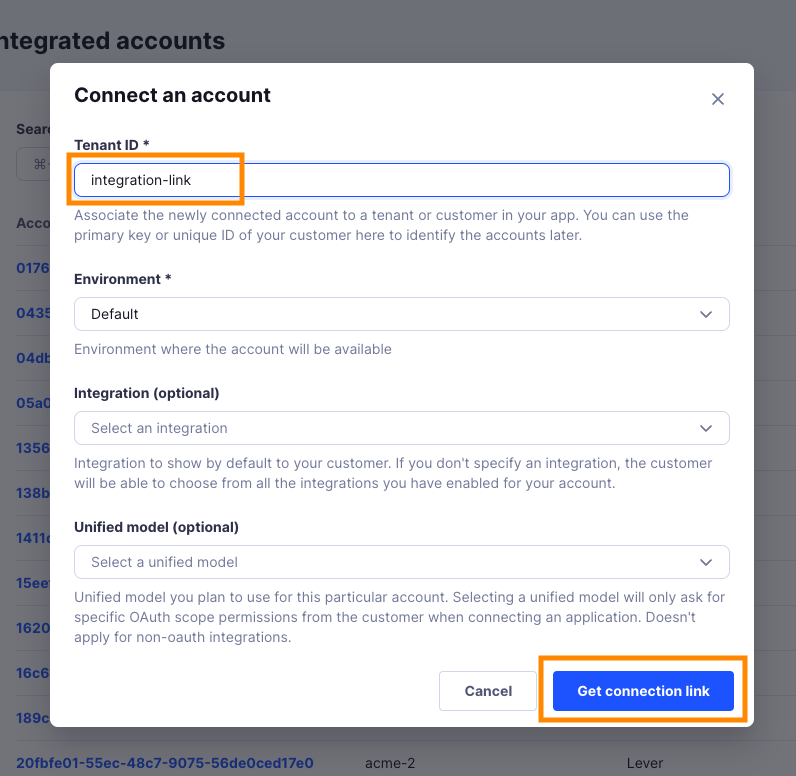
-
Open the generated link. You can also share it with your customer so they connect their own Zoho BugTracker account.
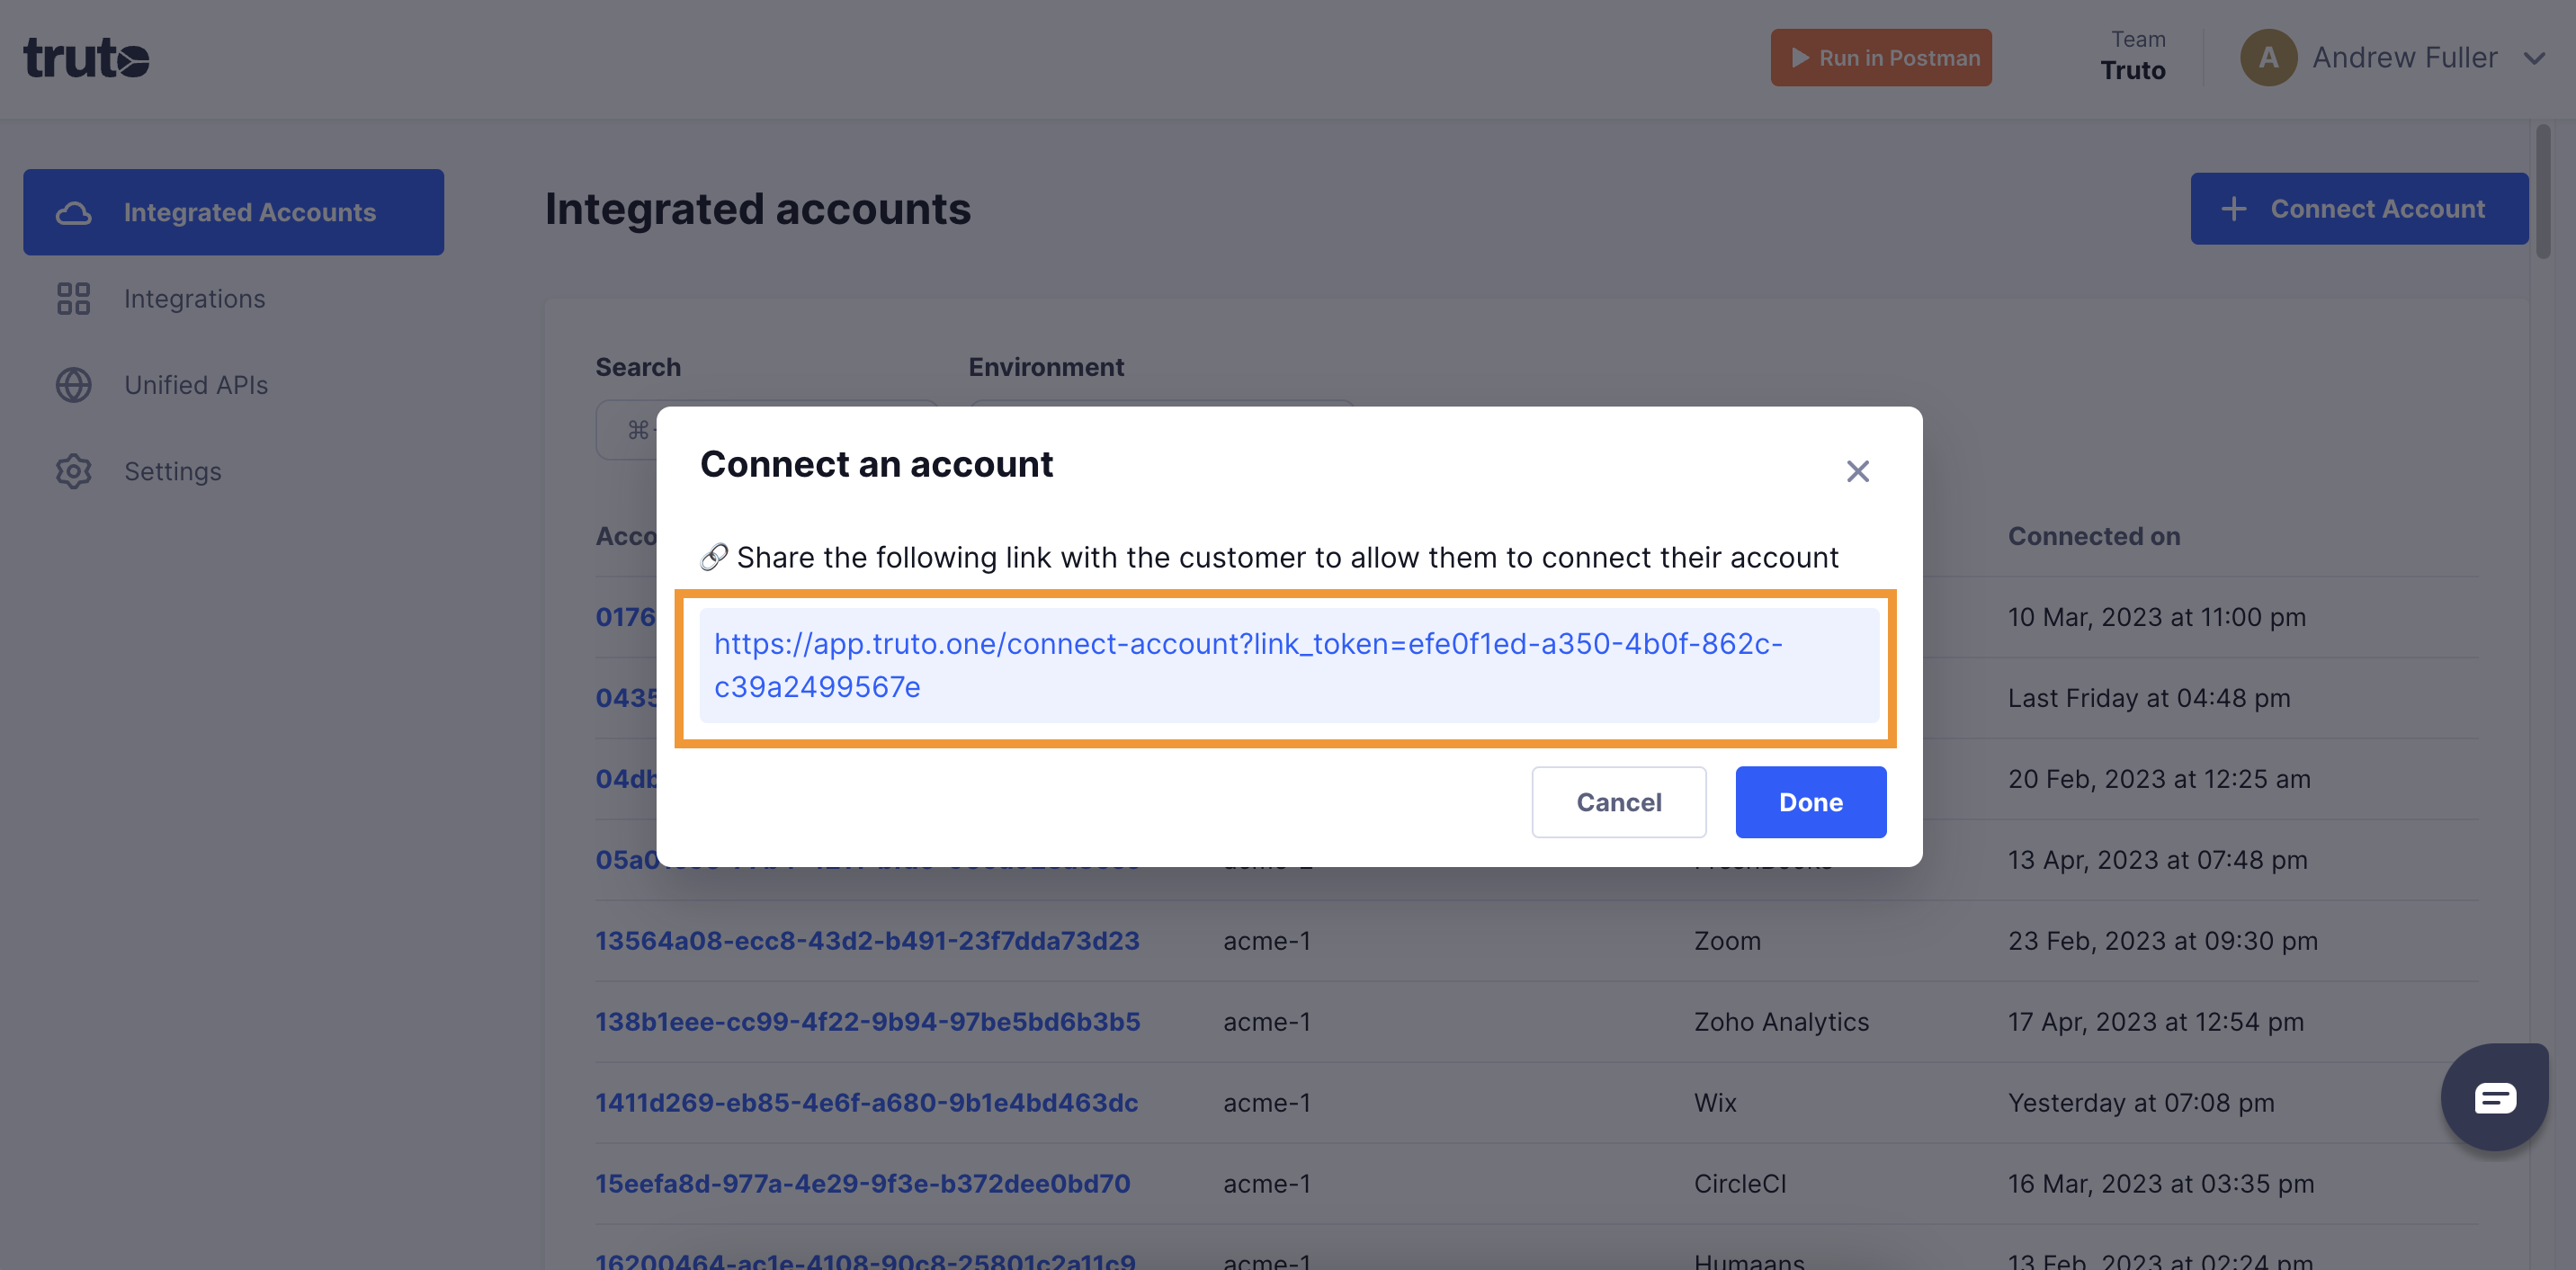
-
Select Zoho BugTracker.
-
Fill in the form and click Connect:
Field Required What to enter Data Center Region Yes The data center your Zoho account is in. It matches the domain of the BugTracker URL, for example bugtracker.zoho.eufor Europe (.eu). Pick one of US (.com), Australia (.com.au), India (.in), Europe (.eu), China (.com.cn), Japan (.jp). Defaults to India (.in). -
Sign in to Zoho BugTracker and allow access.
-
Close the tab when you see the connection successful message. The new account appears under Integrated Accounts. Click its Account ID to see its details and make API calls.