Zendesk Sell
Install Zendesk Sell integration
The Zendesk Sell integration can be found here. Please install it in your environments before proceeding with the steps below.
Set up your Zendesk Sell OAuth app
Truto doesn't ship a Zendesk Sell OAuth app of its own. Before your end users can connect with OAuth, bring yours:
- In Zendesk Sell, go to Settings → Integrations → OAuth → Developer Apps and add an app. Add
https://api.truto.one/connect/zendesksell/callbackas its redirect URL. If you use a redirect URL on your own domain, add that URL instead. - Enter the app's Client ID and Client Secret on the installed Zendesk Sell integration. See Overriding OAuth credentials.
Until you add them, the connect UI offers Zendesk Sell only through the API Key method.
Connecting a Zendesk Sell account
-
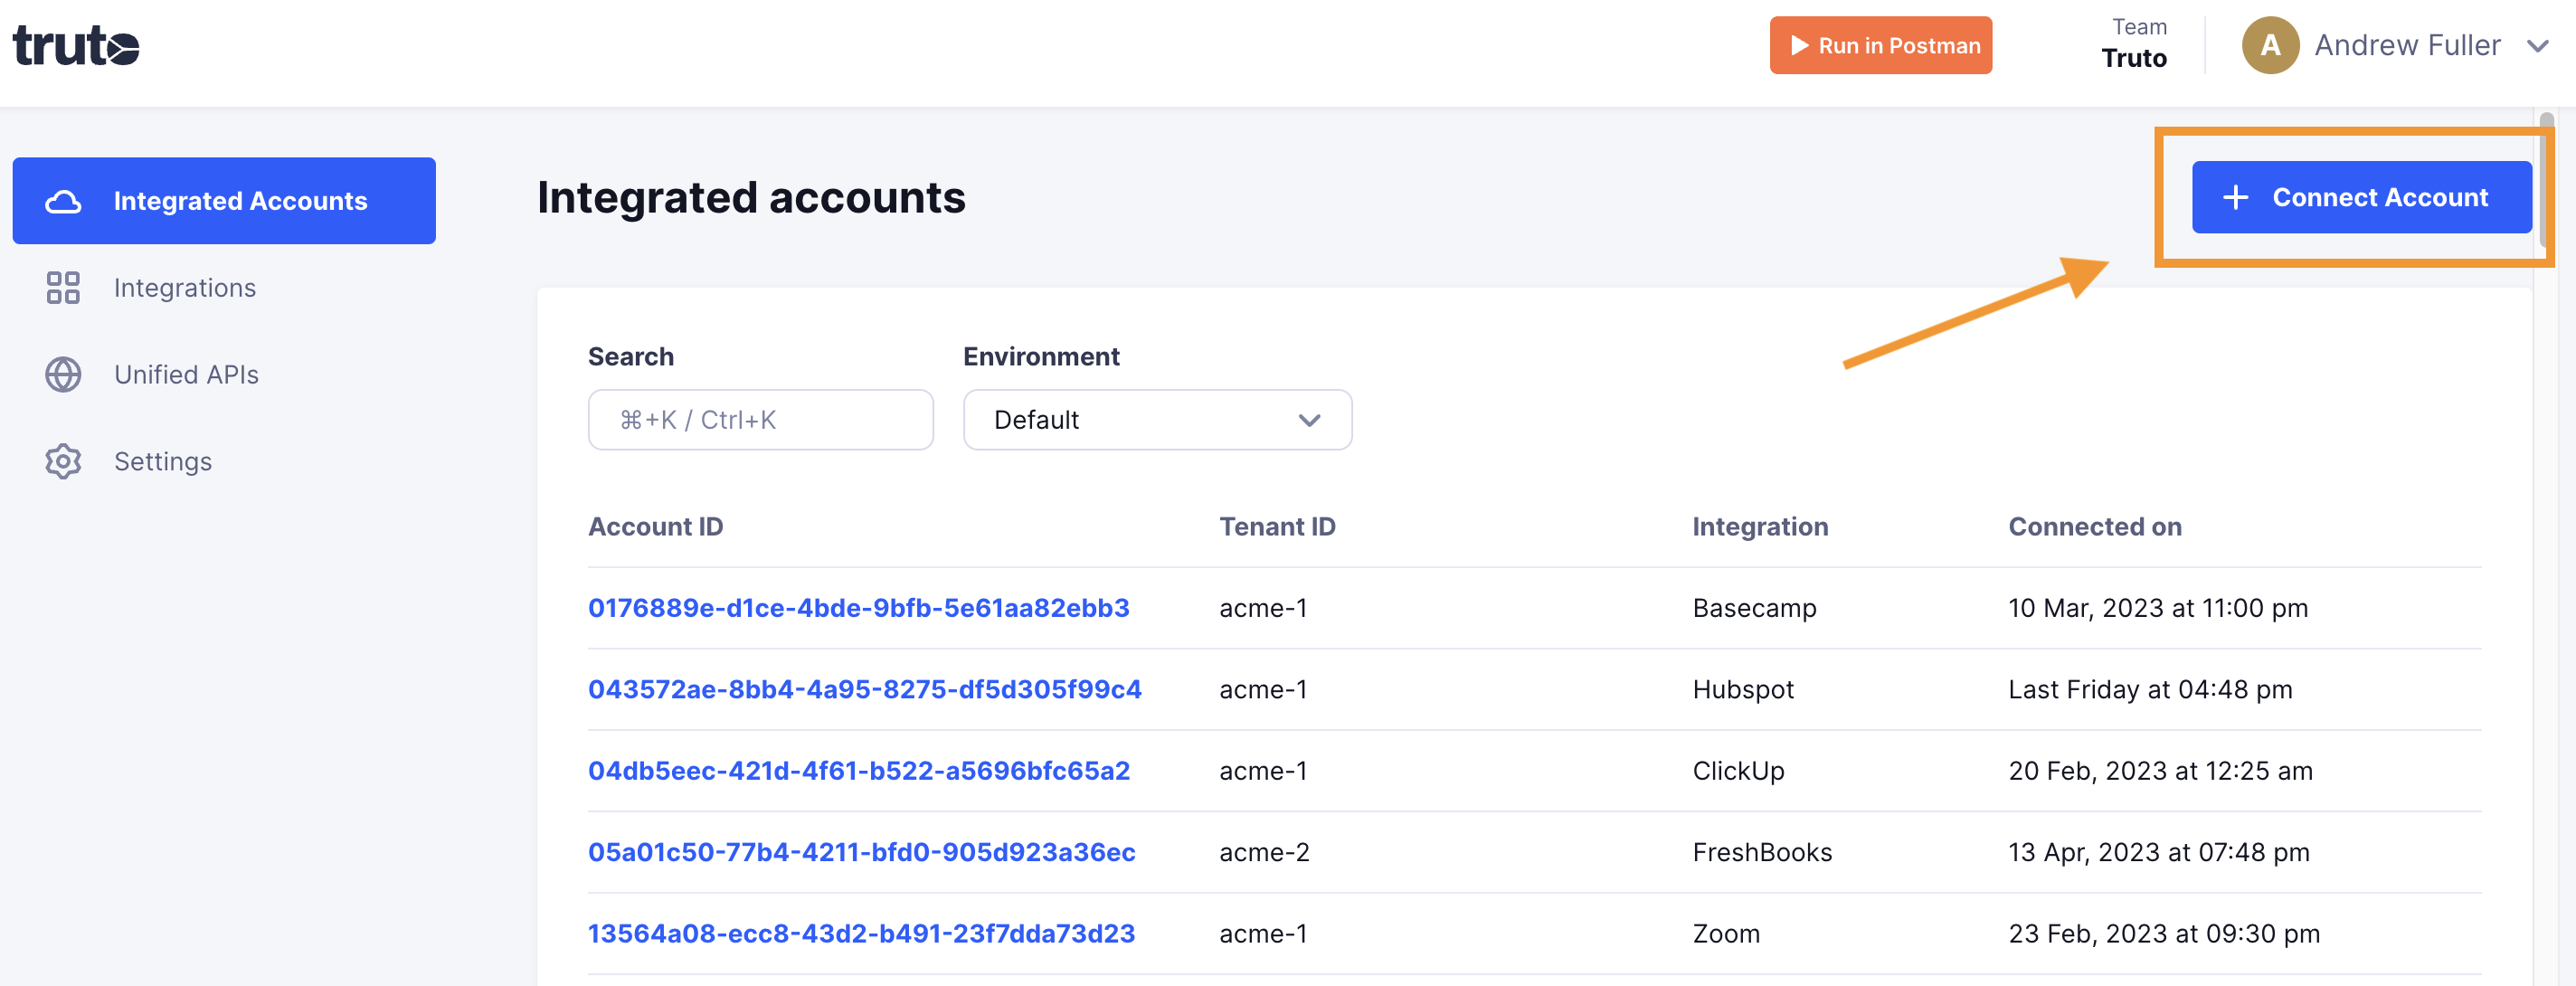
Click on Connect Account
-
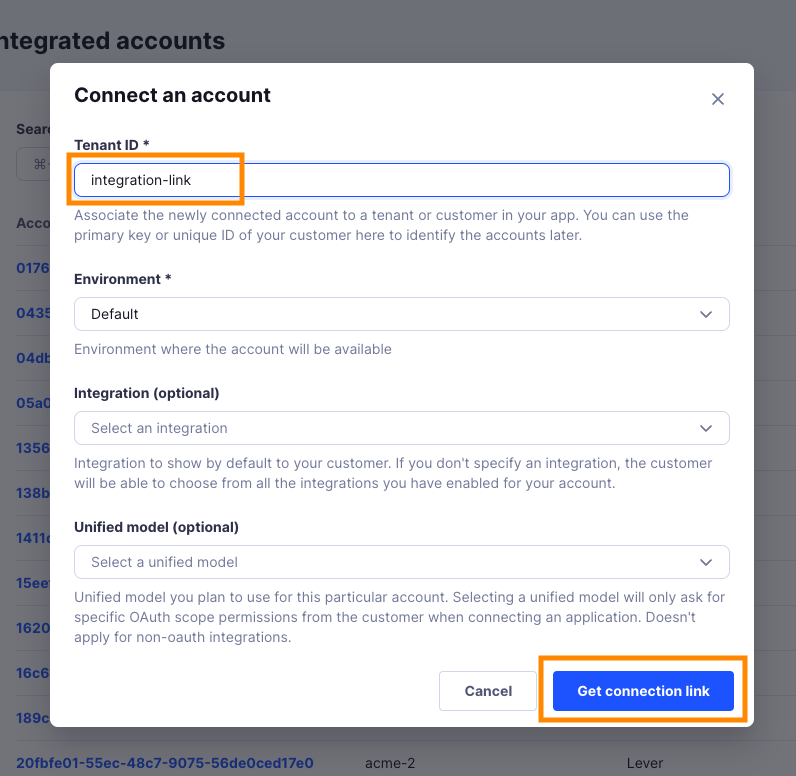
Type in a value for the Tenant ID. This can be any ID of your choosing. And then click on Get connection link
-
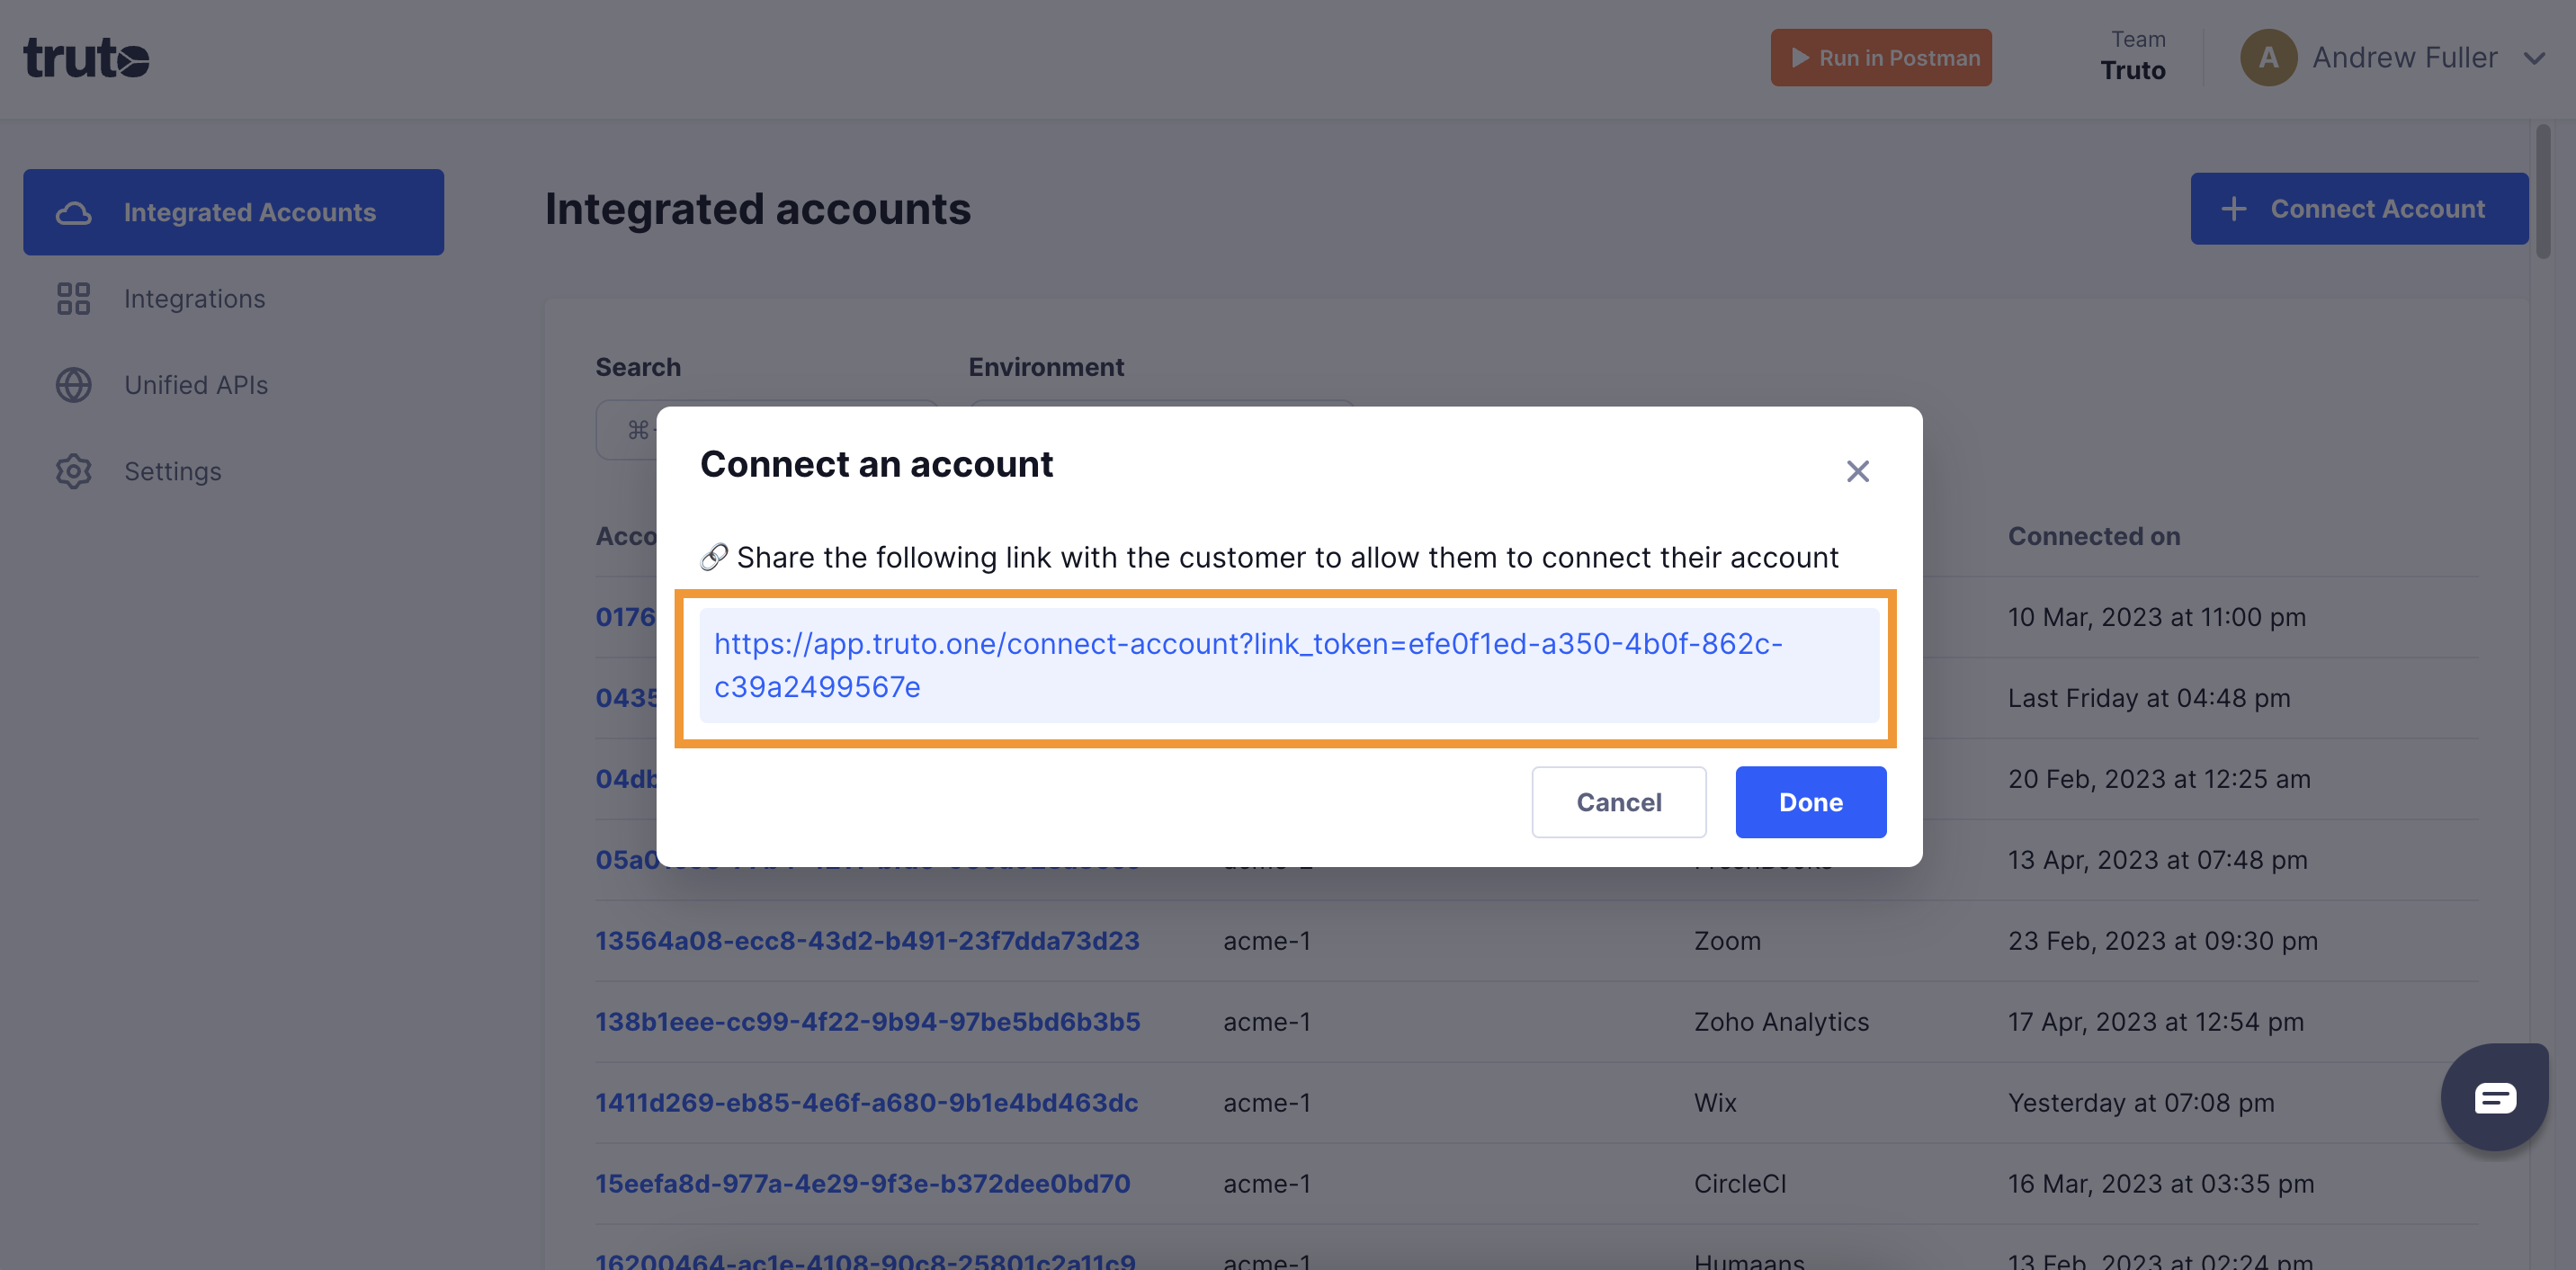
A new link will be generated. Clicking on the link will open a new tab with the list of integrations. You can share this link with your customers too, and they will be able to connect their Zendesk Sell account.
-
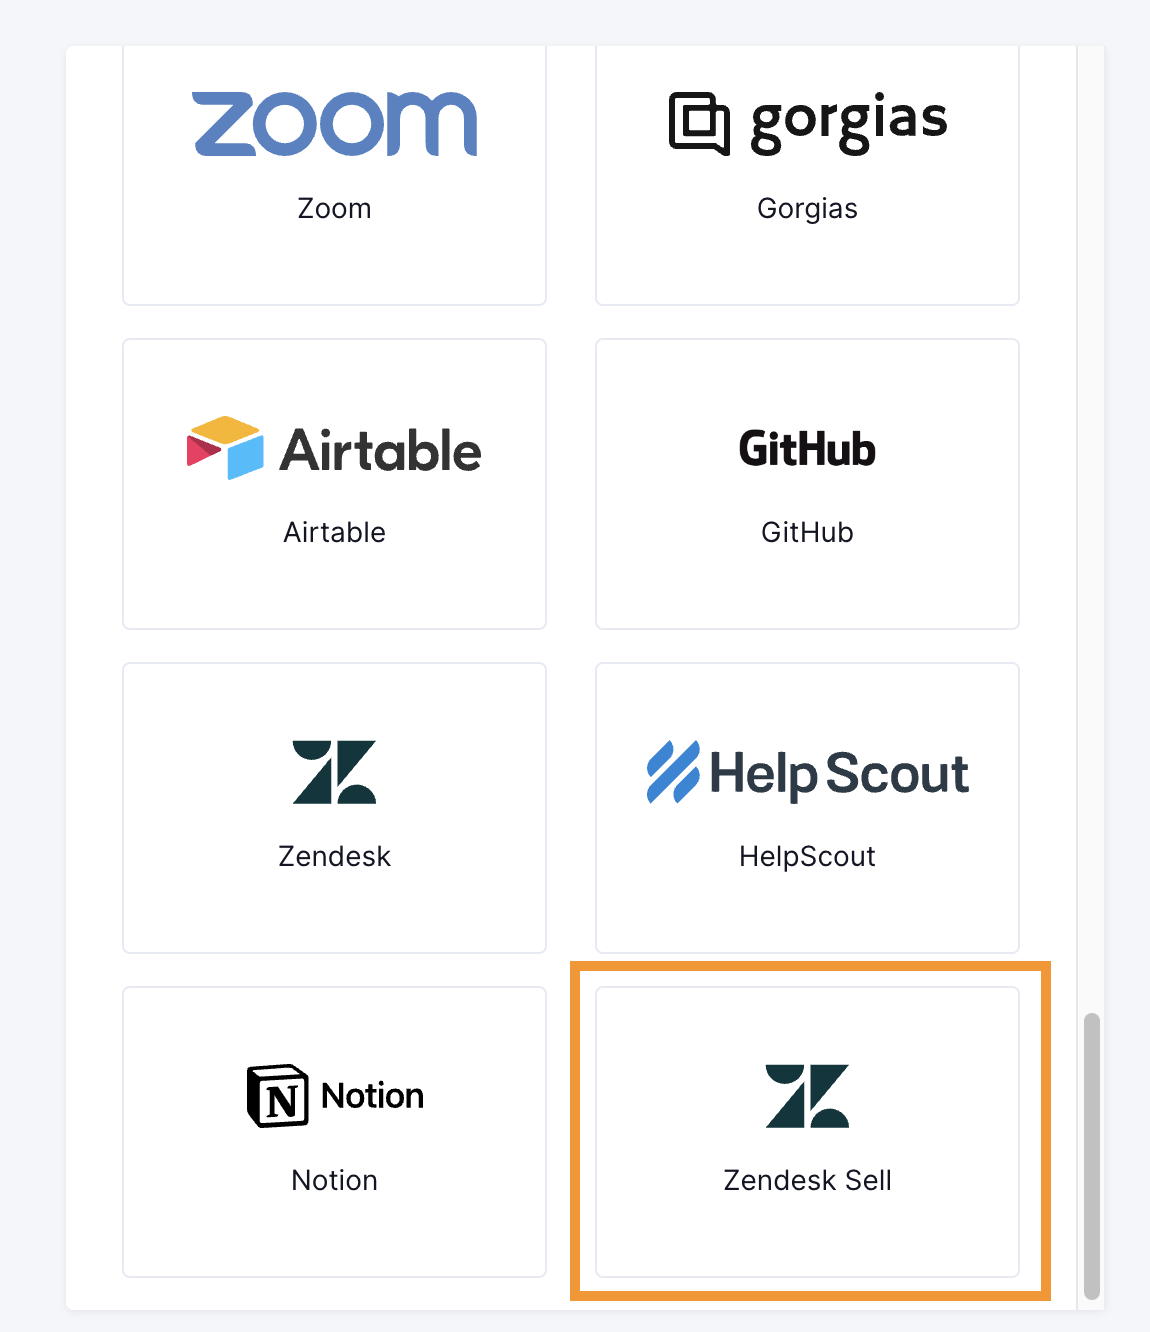
Select Zendesk Sell
-
Choose how to connect:
- OAuth 2.0 (offered once you add your Zendesk Sell app): log in to Zendesk Sell and allow access.
- API Key: enter a Personal Access Token. Create one in Zendesk Sell under Settings → Integrations → OAuth → Access Tokens.
-
You should now see a connection successful message. You can now close this tab.
-
Go to your Truto account, and you should see the new Zendesk Sell integration under Integrated Accounts. Click on the Account ID to view the details and initiate API calls.