ServiceNow
ServiceNow connects with the OAuth 2.0 client credentials grant: an OAuth application in your instance, tied to a ServiceNow user whose roles decide what Truto can read and write.
- You need the
adminrole on the ServiceNow instance.
Install the ServiceNow integration
Install ServiceNow from Available integrations in each environment you connect accounts from.
1. Enable the client credentials grant
ServiceNow turns the client credentials grant off by default. Create the system property that turns it on:
- Name:
glide.oauth.inbound.client.credential.grant_type.enabled - Value:
true
See ServiceNow's Client Credentials docs.
2. Register an OAuth endpoint
- Go to All → System OAuth → Application Registry and click New.
- Select Create an OAuth API endpoint for external clients.
- Enter a name. ServiceNow generates a Client ID and a Client Secret.
- Add the OAuth Application User field to the form, and set it to the ServiceNow user Truto acts as. Give that user the roles for the tables you need.
- Save the record, then copy the Client ID and Client Secret.
Connect a ServiceNow account
-
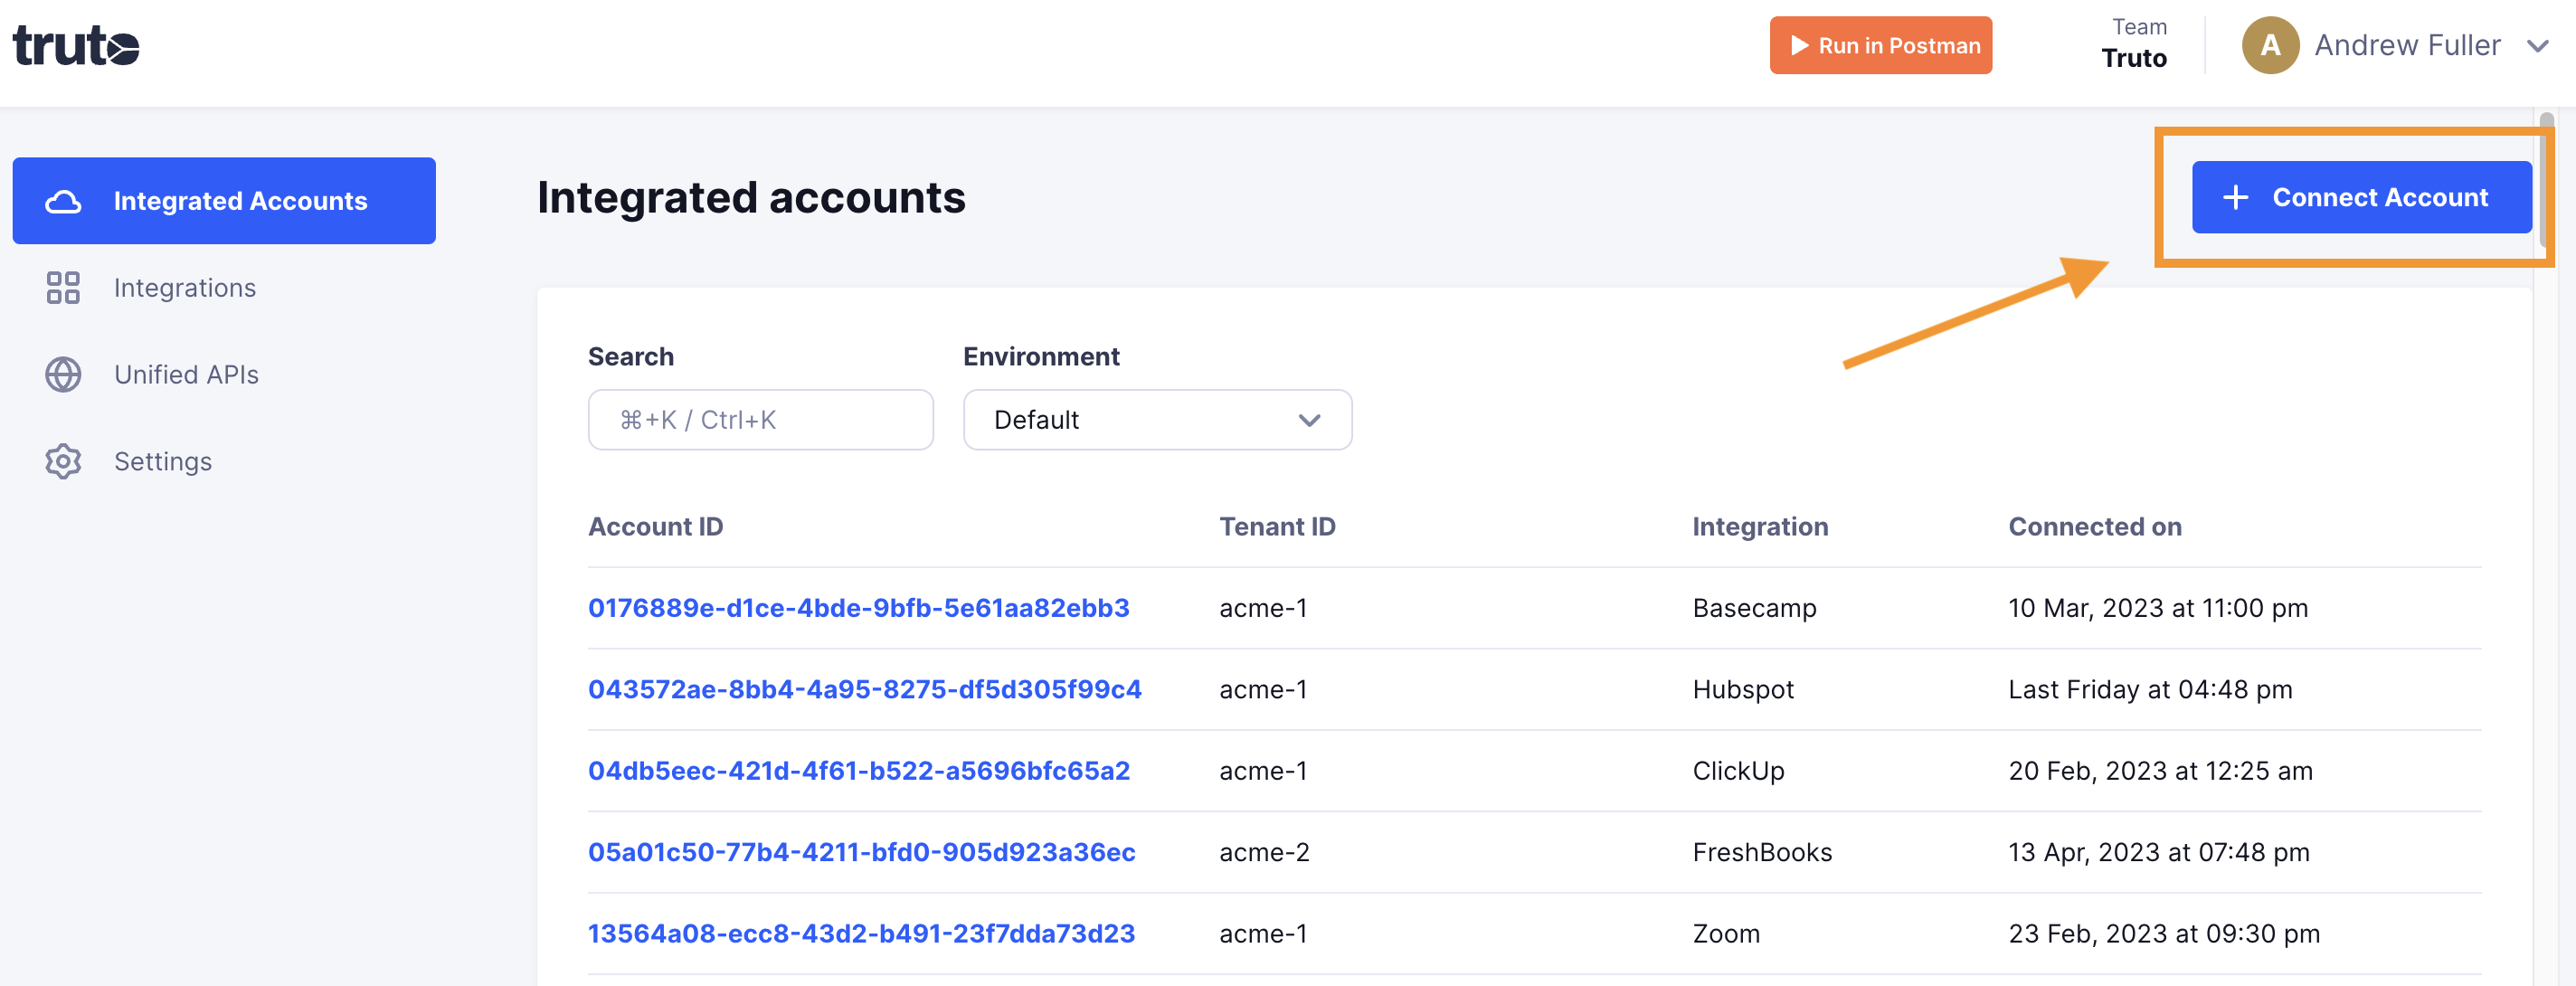
Click Connect Account.
-
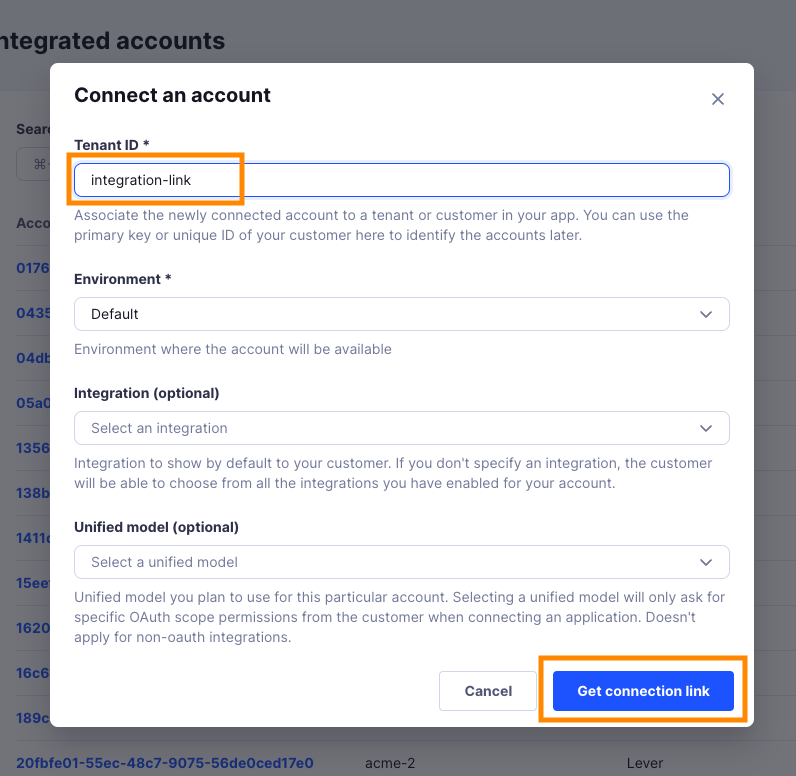
Enter a Tenant ID. This can be any ID you choose. Click Get connection link.
-
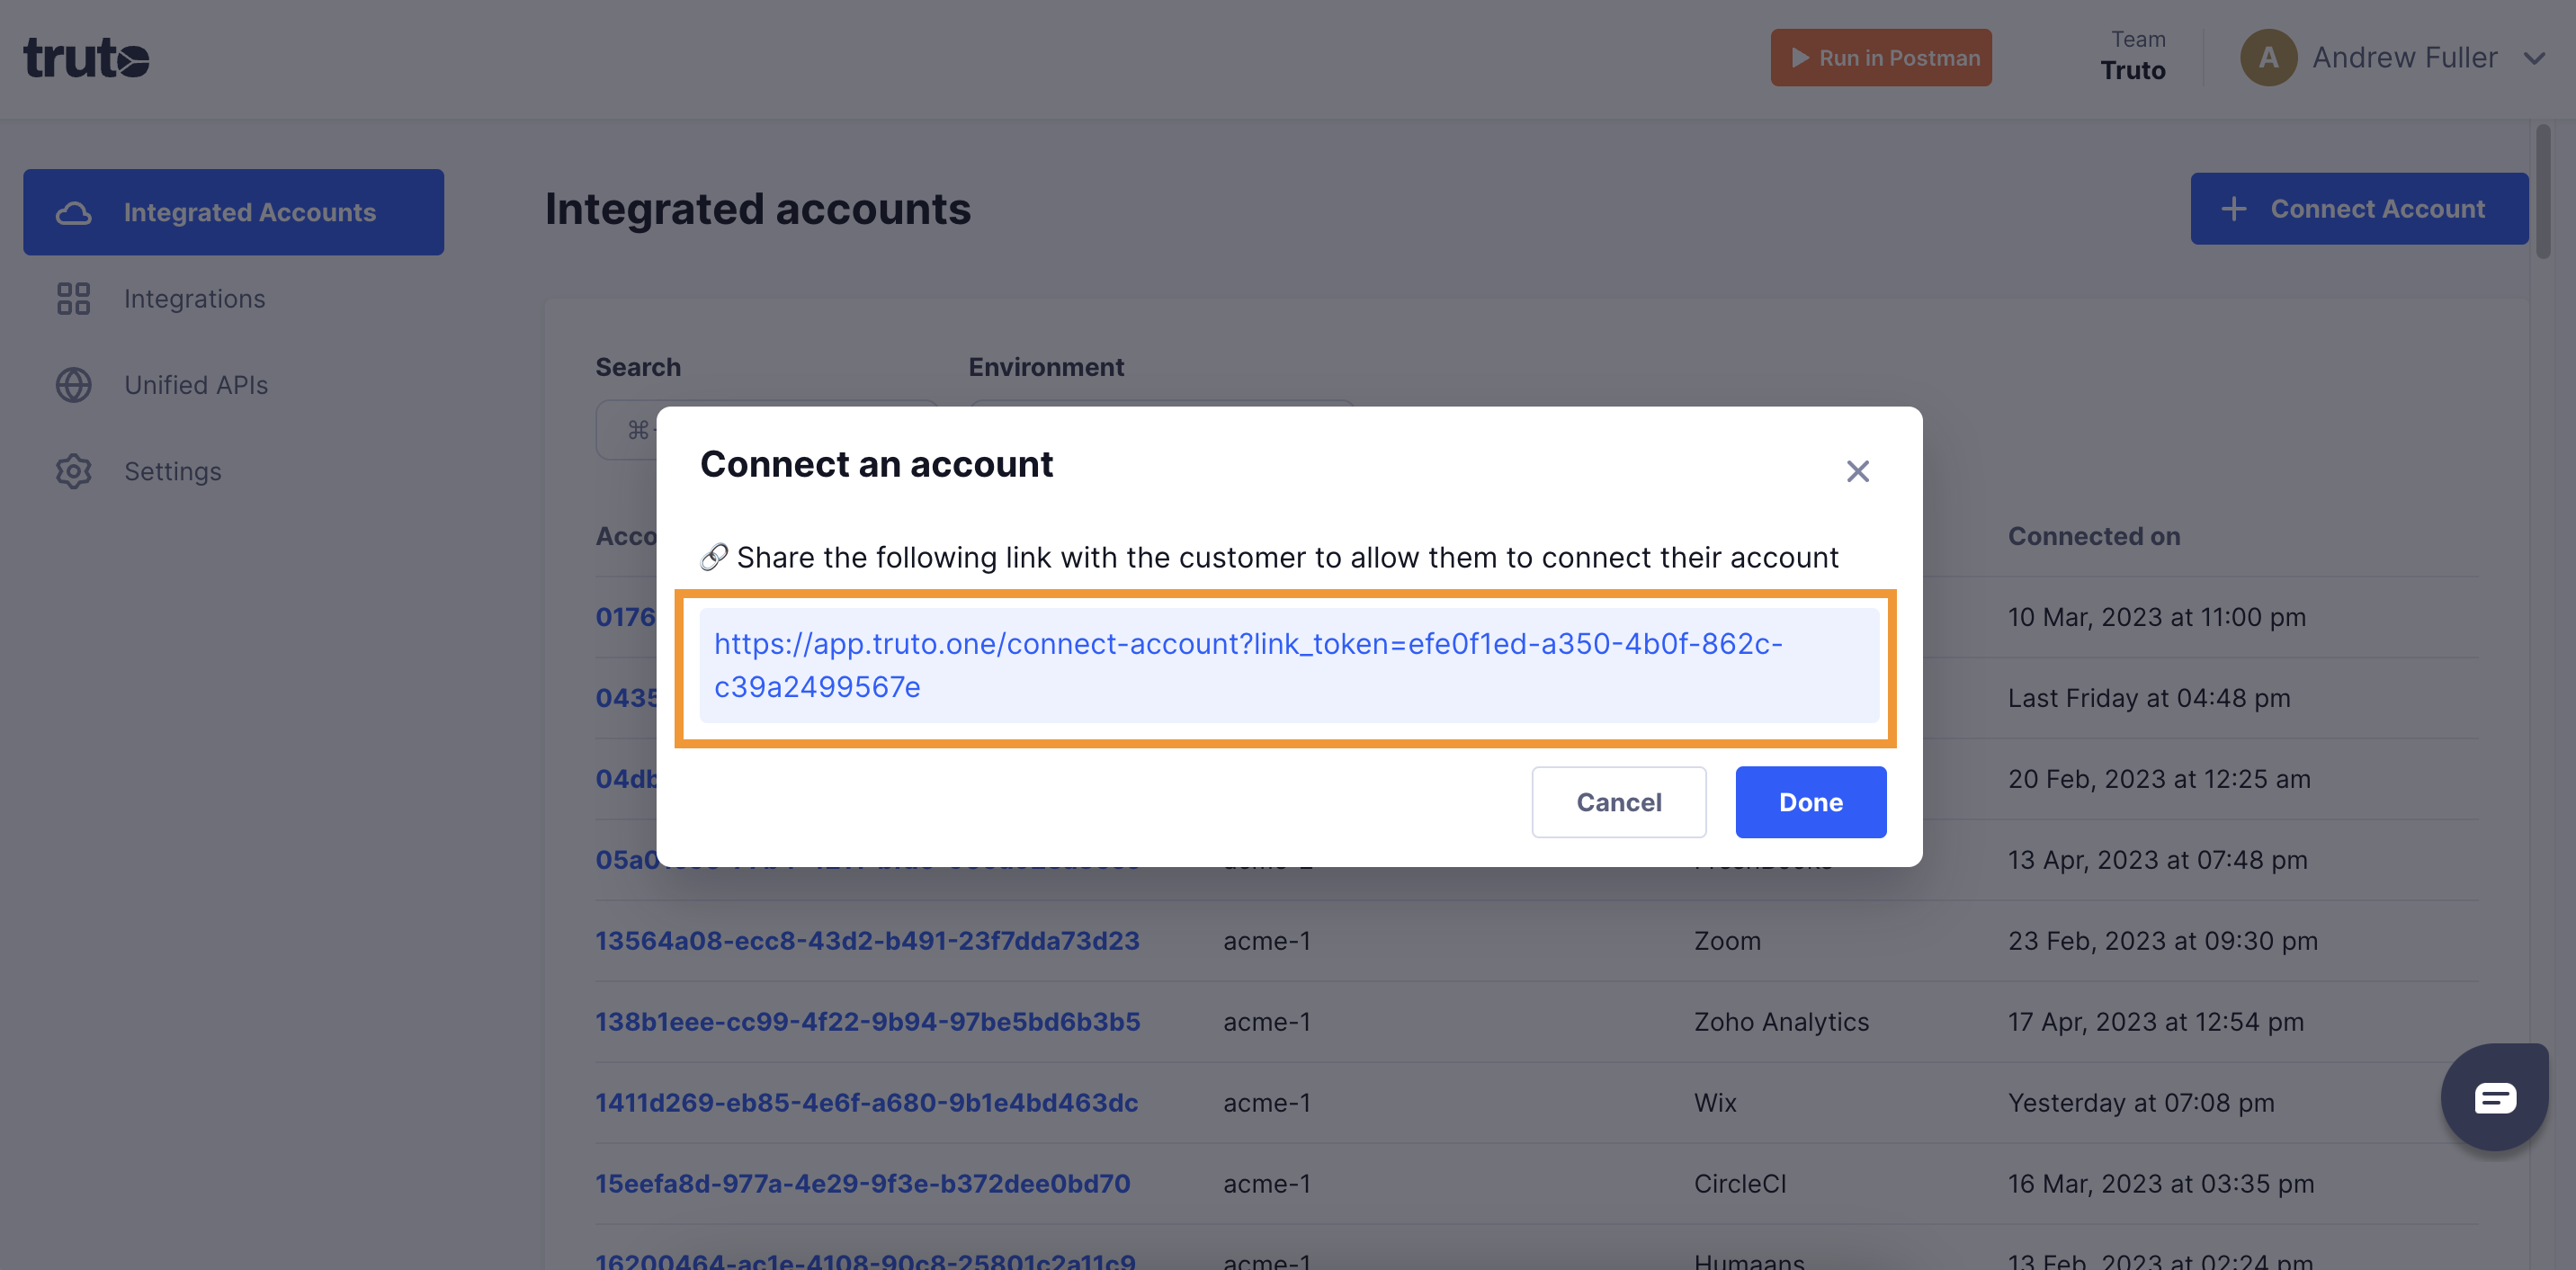
Open the generated link. You can also share it with your customer so they connect their own ServiceNow account.
-
Select ServiceNow.
-
Fill in the form and click Connect:
Field Required What to enter Client ID Yes The Client ID of the OAuth application. Client Secret Yes The Client Secret of the OAuth application. Instance Name Yes The first part of your instance URL: for https://acme.service-now.com, enteracme.Service Module Yes Which ServiceNow product the account uses. Pick CSM for Customer Service Management, or leave ITSM for IT Service Management. -
Close the tab when you see the connection successful message. The new account appears under Integrated Accounts. Click its Account ID to see its details and make API calls.