JFrog
JFrog connects with an access token and the URL of your JFrog Platform instance.
Install the JFrog integration
Install JFrog from Available integrations in each environment you connect accounts from.
Generate an access token
- Sign in to JFrog and go to Platform Configurations → User Management → Access Tokens.


- Click Generate Token.

- Fill in the details and click Generate.

- Copy the token.
For JFrog Cloud, the Base URL is the address of your instance in the browser, for example https://acme.jfrog.io.

Connect a JFrog account
-
Click Connect Account.
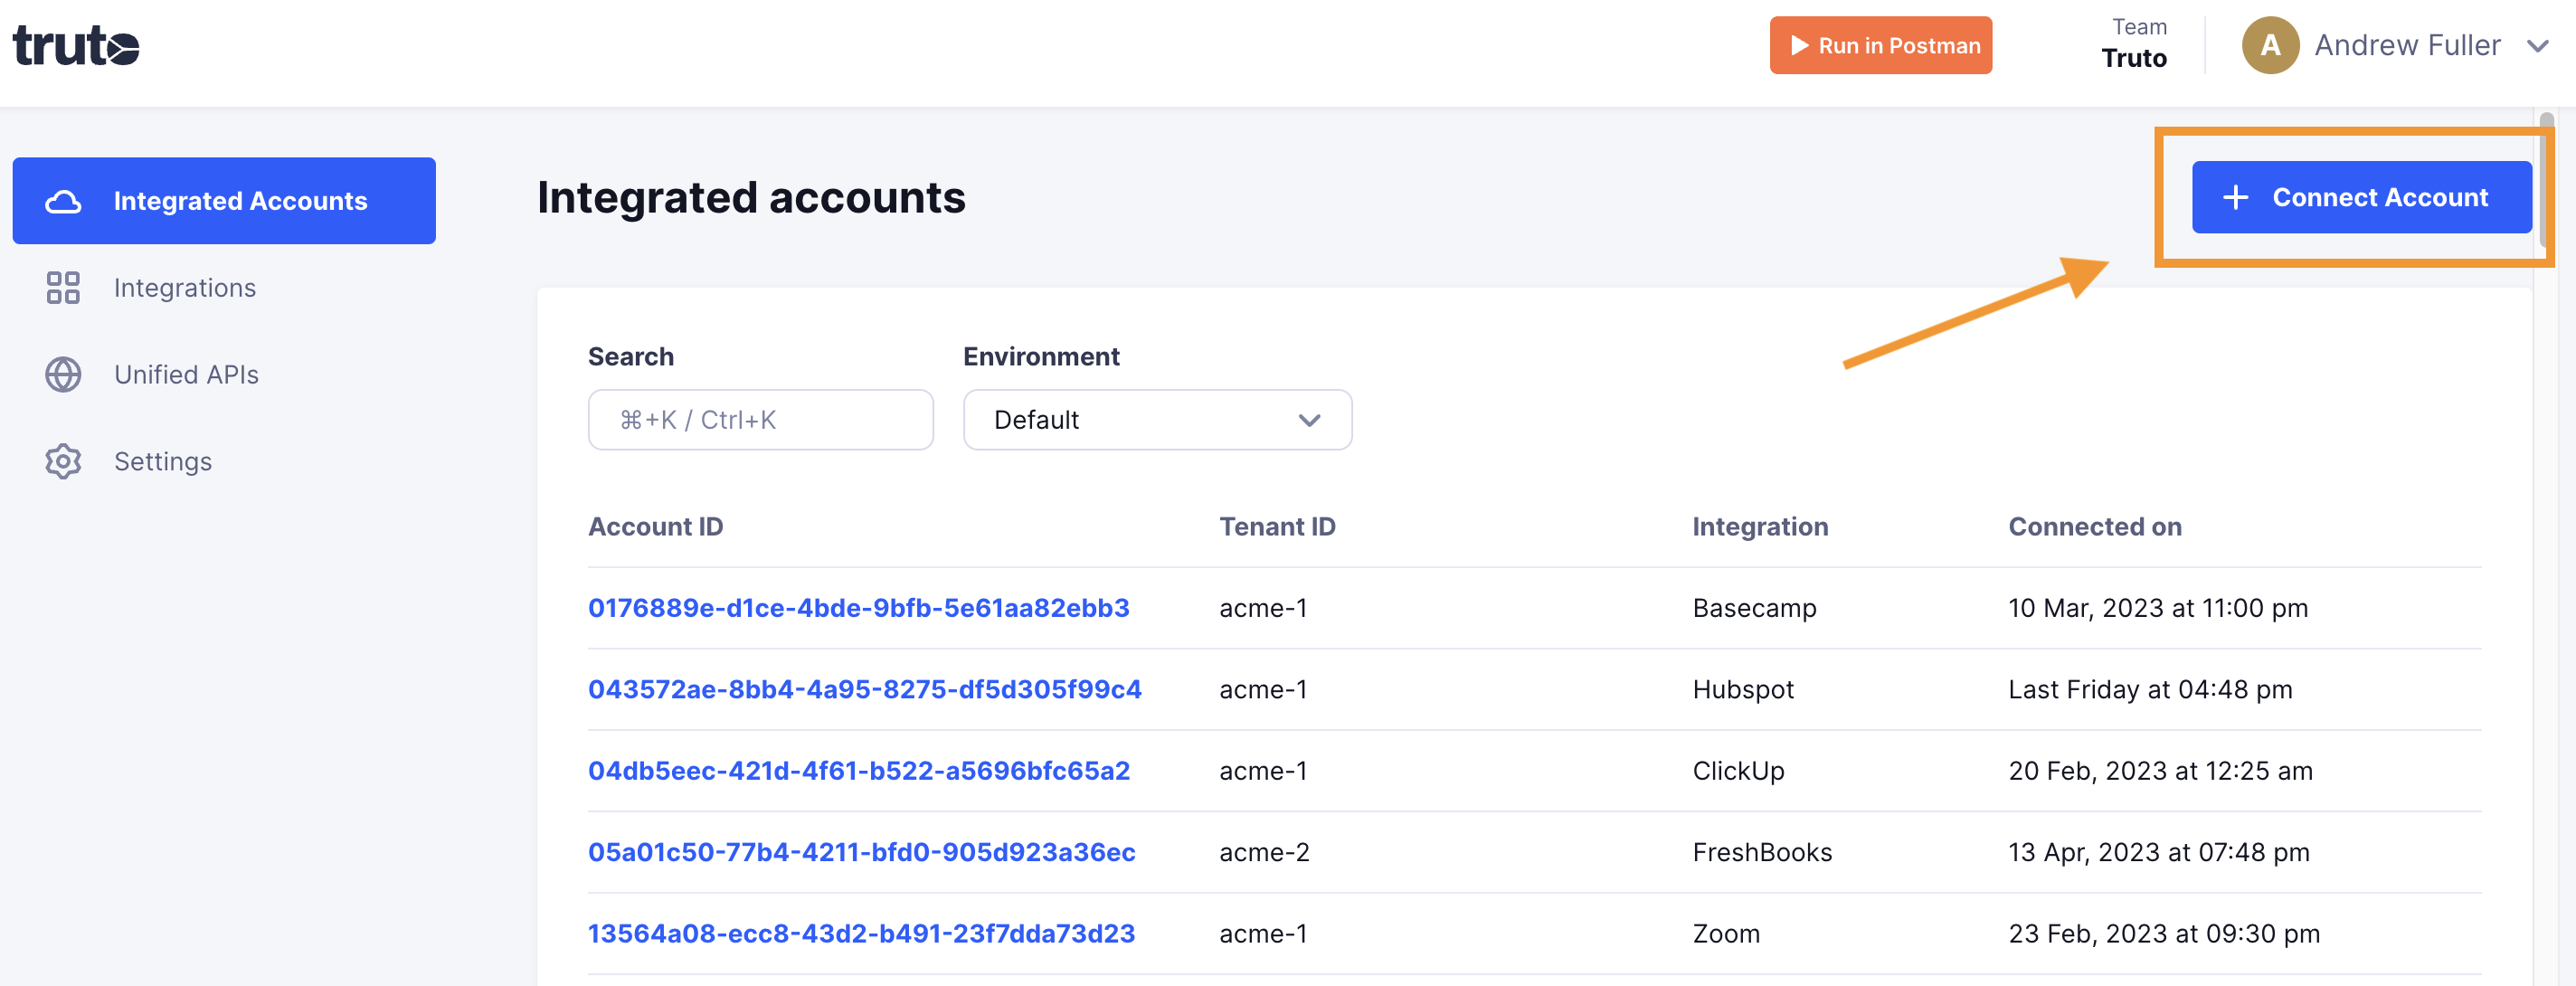
-
Enter a Tenant ID. This can be any ID you choose. Click Get connection link.
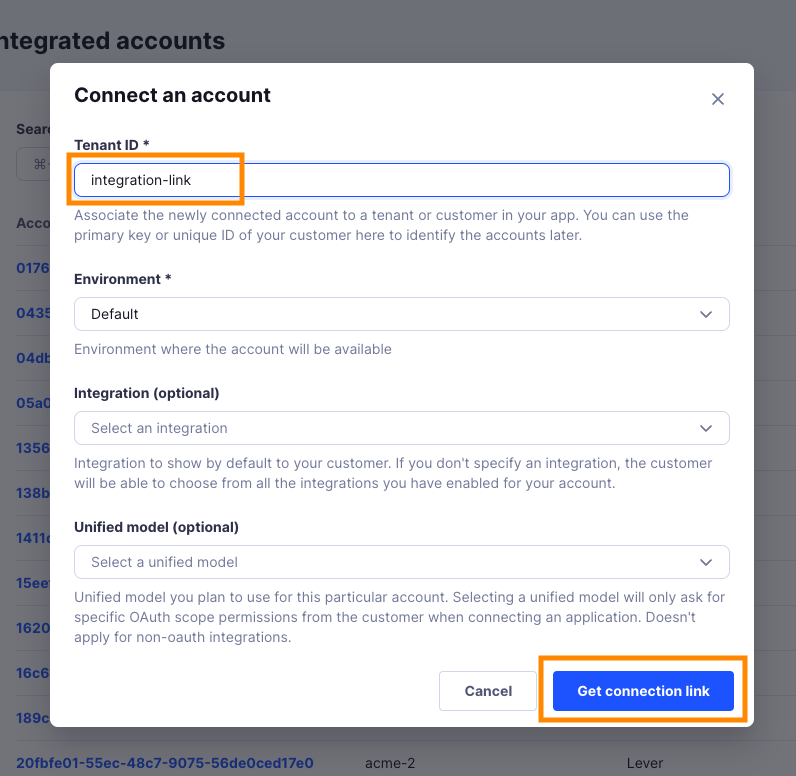
-
Open the generated link. You can also share it with your customer so they connect their own JFrog account.
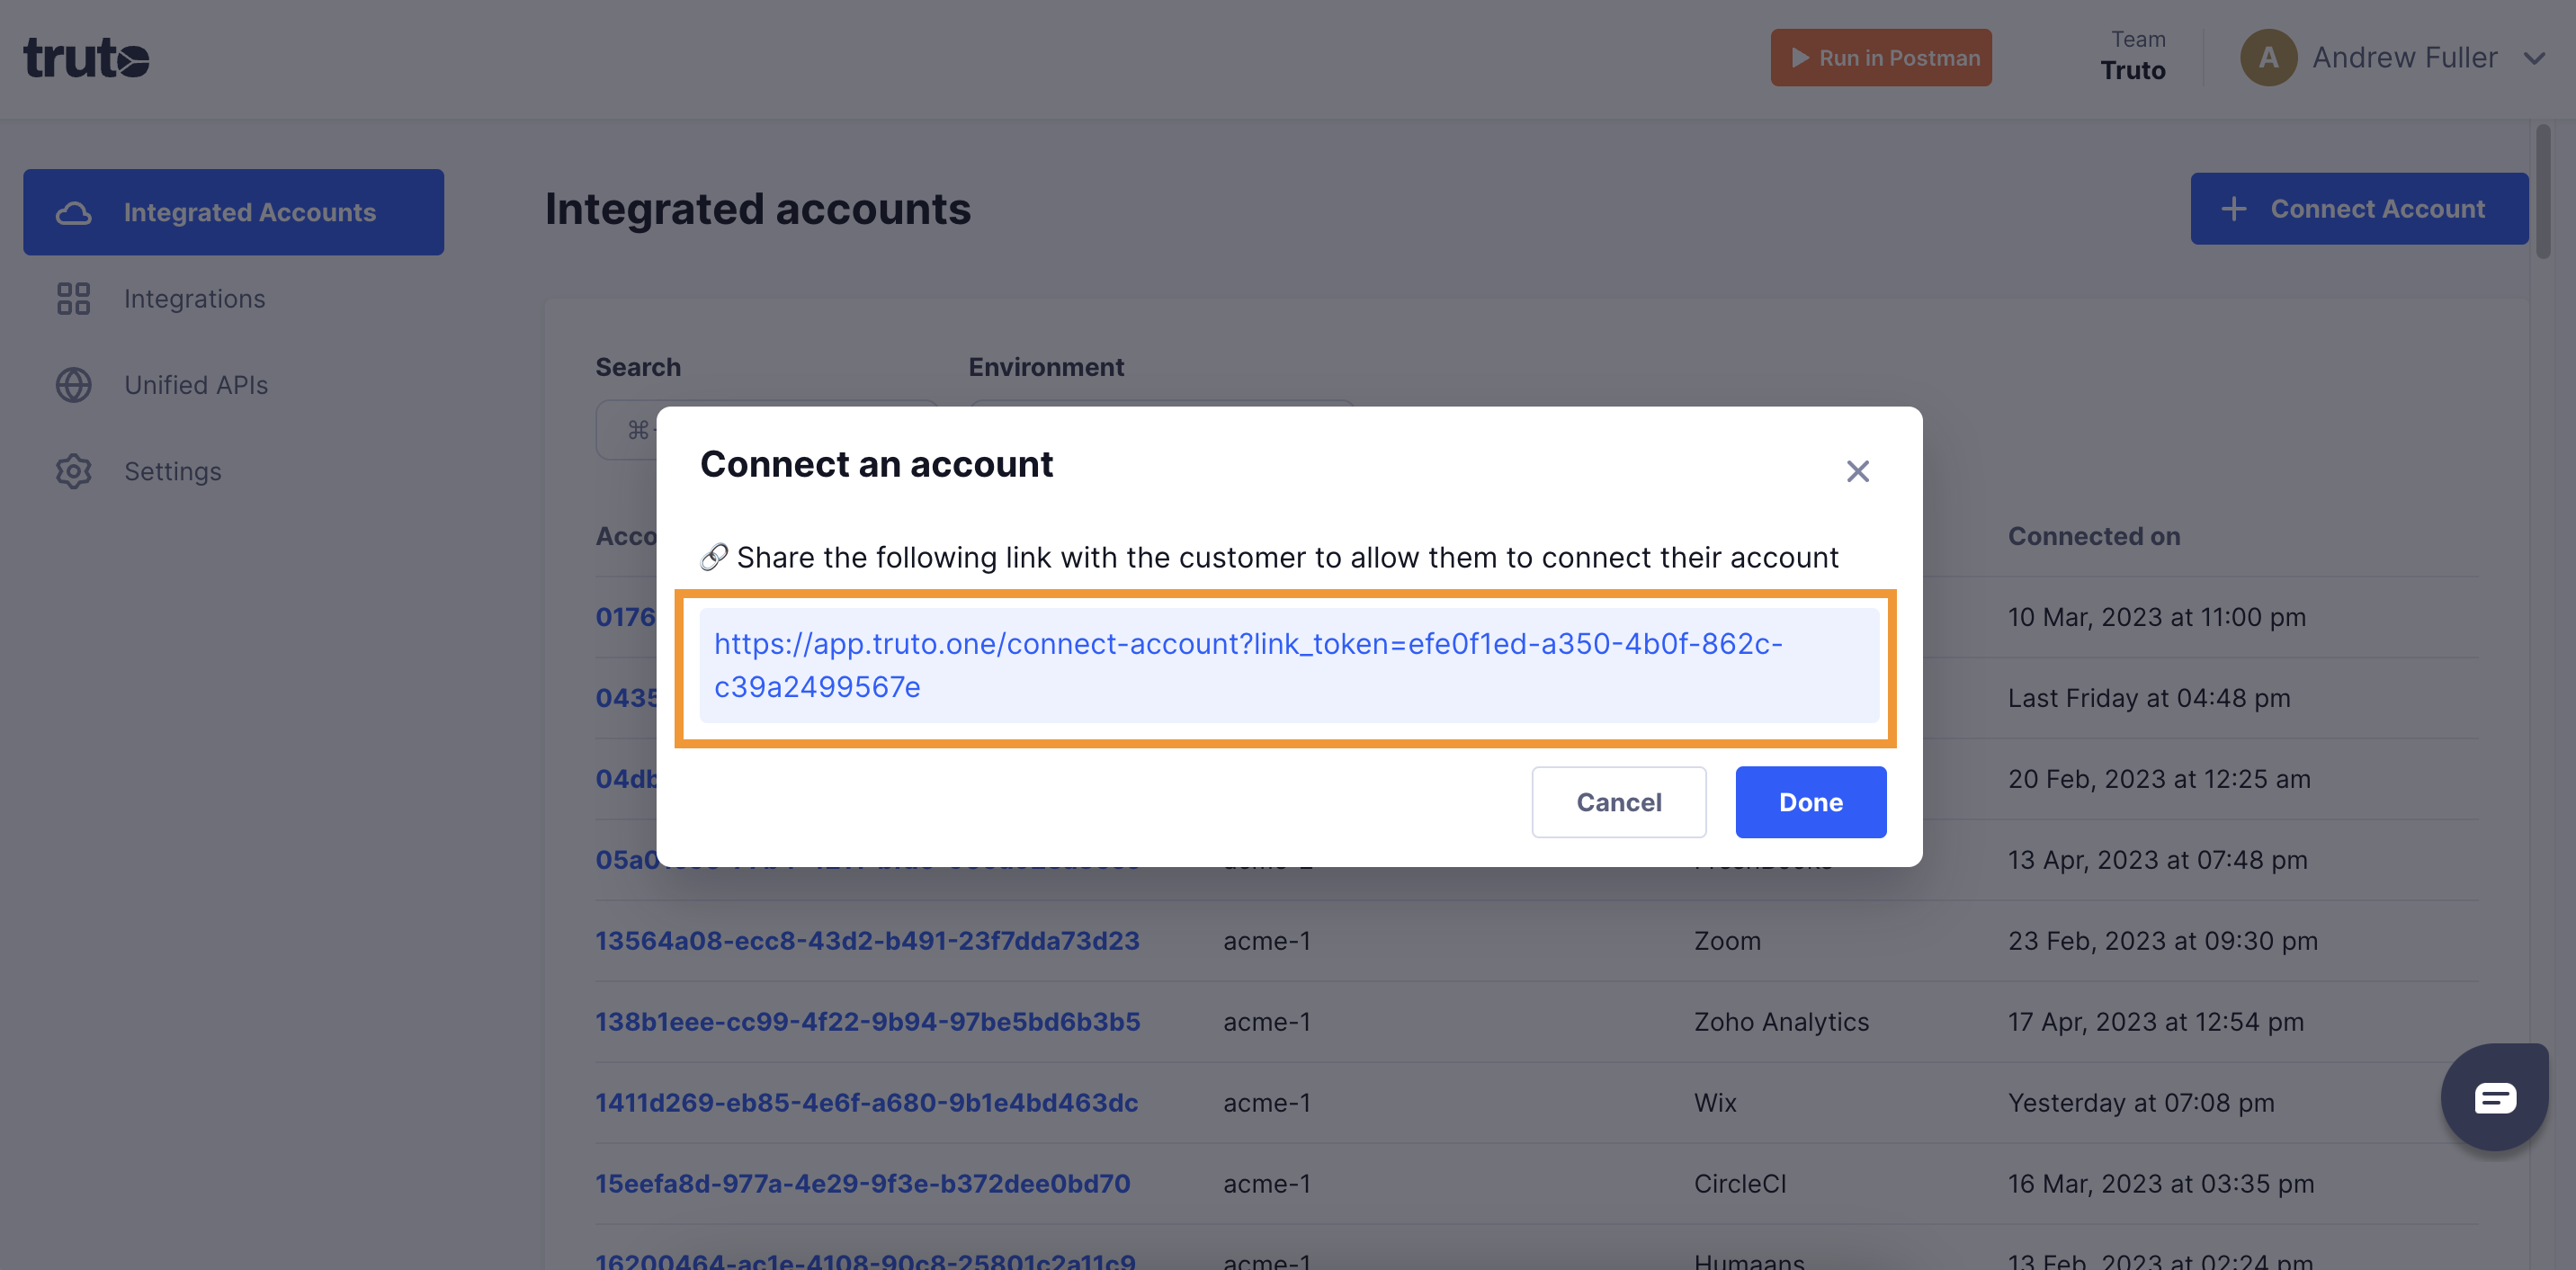
-
Select JFrog.
-
Fill in the form and click Connect:
Field Required What to enter API Key Yes Your JFrog access token. Base URL Yes The URL of your JFrog Platform instance, for example https://acme.jfrog.io. For a self-hosted installation, usehttp://<JFROG_PLATFORM_URL>:<ROUTER_PORT>. -
Close the tab when you see the connection successful message. The new account appears under Integrated Accounts. Click its Account ID to see its details and make API calls.