Getting Started
Setting up a RapidForm is straightforward and can be accomplished in a few simple steps. This guide will walk you through enabling RapidForm, defining the necessary fields, and setting up dynamic interactions—using an Asana Integration as an example.
Enable RapidForm
To begin using RapidForm, you need to enable it in your integration settings.
- Navigate to Integration Settings: Go to the settings page of the integration where you want to use RapidForm.
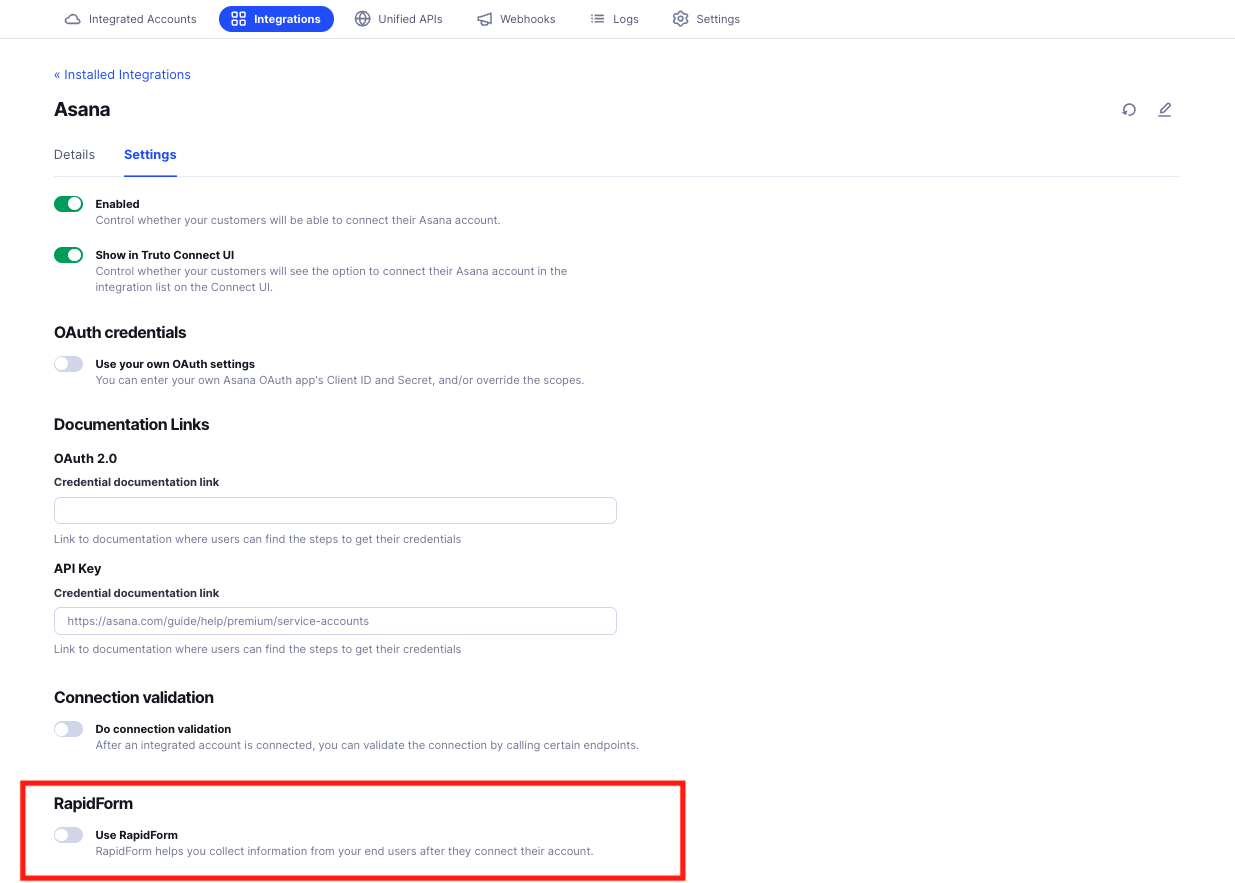
- Enable RapidForm: Find the RapidForm option and toggle it on.

Create Fields in RapidForm
With RapidForm enabled, you can start creating fields to gather information from users. In this example, we'll allow users to select a Workspace and its associated Projects to sync from Asana.
Create a Field for Workspace
Purpose: Let users select the Asana workspace they want to sync.
Steps:
- As soon as the RapidForm button is toggled, a new field is shown. Use this field to configure the Workspace
- Configure the Field:
- Name: Enter a unique identifier (e.g.,
workspace_id). - Label: Provide a user-friendly name (e.g.,
Workspace). - Type: Select Single-Select, as users can choose only one workspace.
- Help Text: Add guidance (e.g.,
Select the workspace you want to sync).
- Name: Enter a unique identifier (e.g.,
- Set Data Source:
- Request Type: Choose Unified API or Proxy API based on your data fetching method.
- Resource: Specify the endpoint to fetch data from (e.g.,
ticketing/workspacefor Unified APIs). - Method: Select list to retrieve the list of workspaces. The supported methods include
listandget
- Click on Save:
Your Workspace field is now configured.

Create a Field for Projects
Purpose: Allow users to select multiple projects within the chosen workspace.
Steps:
Add Another Field: Click on "Add Field" to create a new form field.
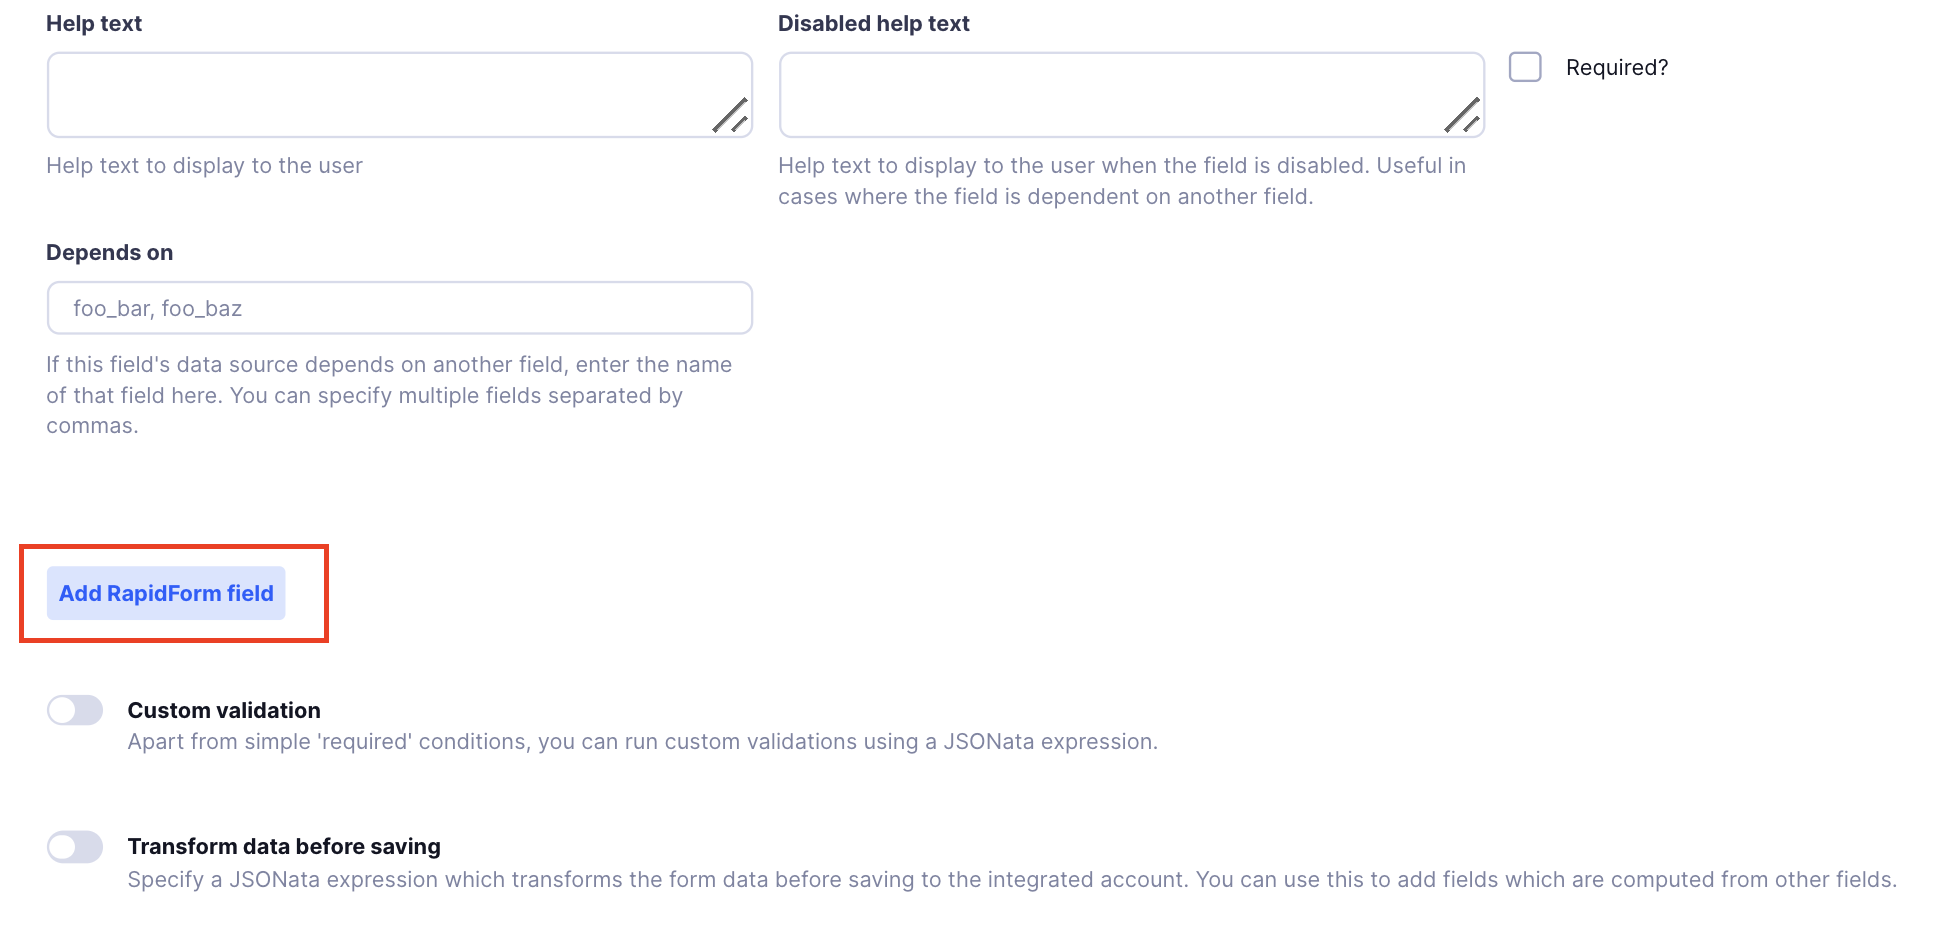
Configure the Field:
- Name: Enter a unique identifier (e.g.,
projects). - Label: Provide a user-friendly name (e.g.,
Projects). - Type: Select Multi-Select, as users can choose multiple projects.
- Help Text: Add guidance (e.g.,
Select the projects you want to sync).
- Name: Enter a unique identifier (e.g.,
Set Data Source:
- Request Type: Choose Unified API or Proxy API.
- Resource: Specify the endpoint to fetch data from (e.g.,
ticketing/project). - Method: Select the appropriate method to retrieve projects.
Add Query Parameters:
- Use the
workspace_idfrom the previous field to fetch projects specific to the selected workspace.
- Use the
Set Field Dependency:
- Depends On: Specify that this field depends on
workspace_id. - Reset on Change: Check the option to reset the field when
workspace_idchanges, ensuring the projects list updates accordingly.
- Depends On: Specify that this field depends on
Click on Save:
Your Projects field is now set up.
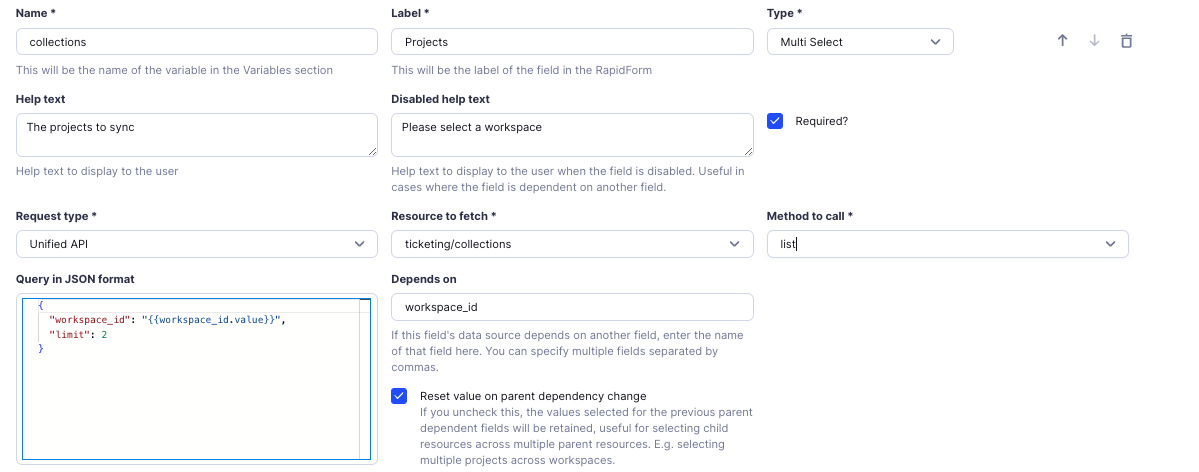
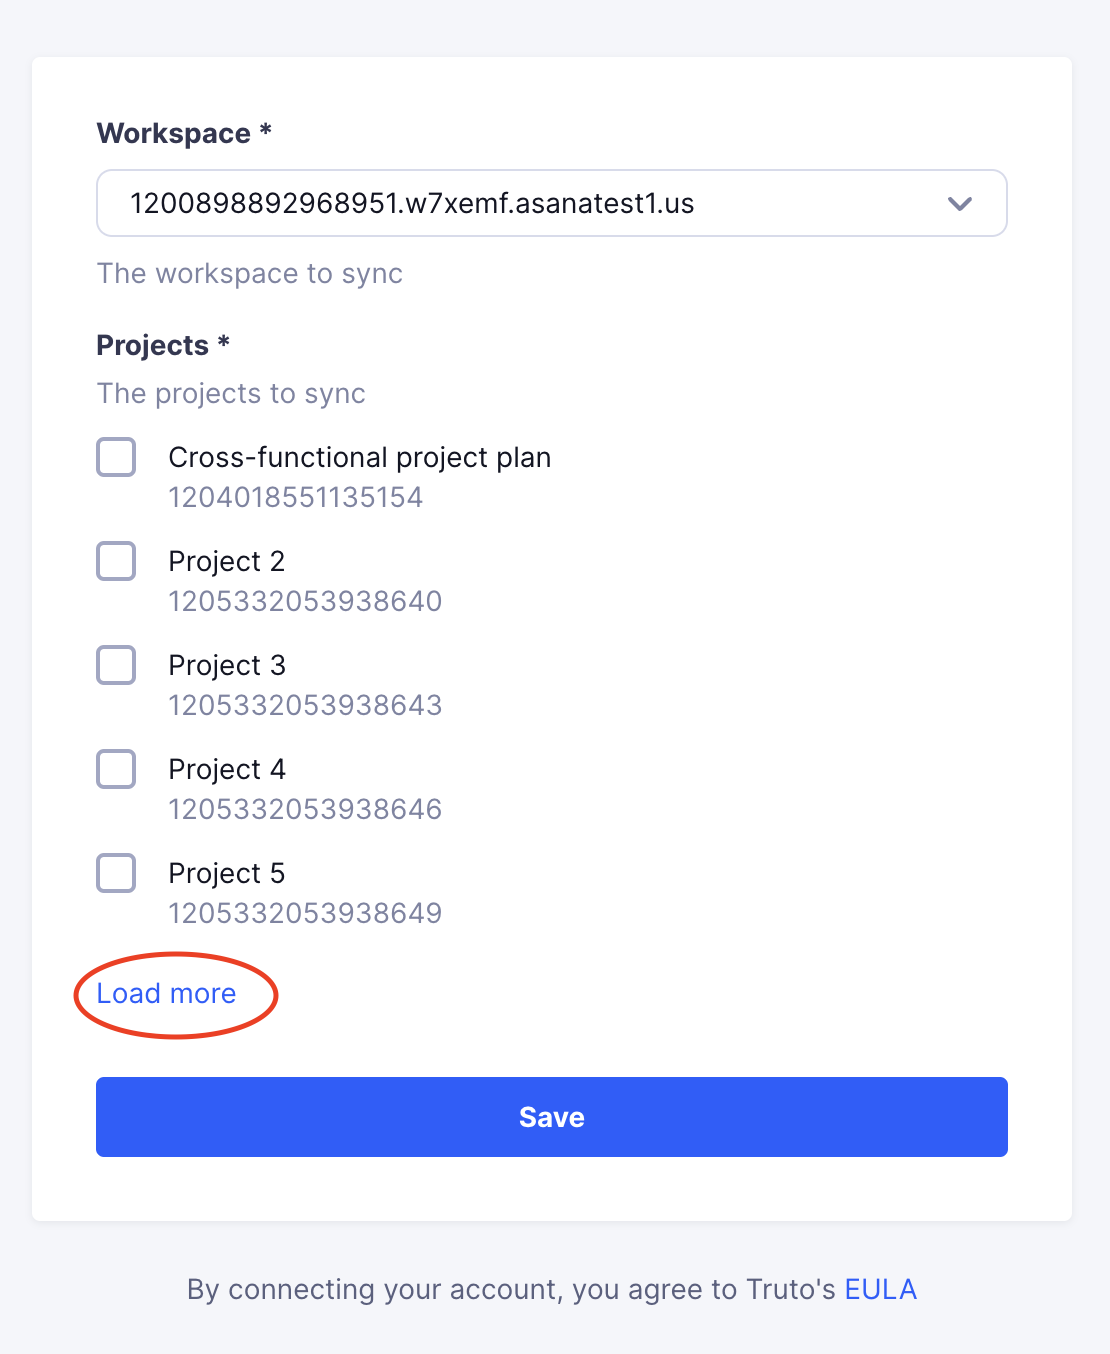
How the configured RapidForm Appears to Users
Dynamic Interaction Between Fields
- Initial State: The Projects field remains empty until a workspace is selected.
After Selecting a Workspace
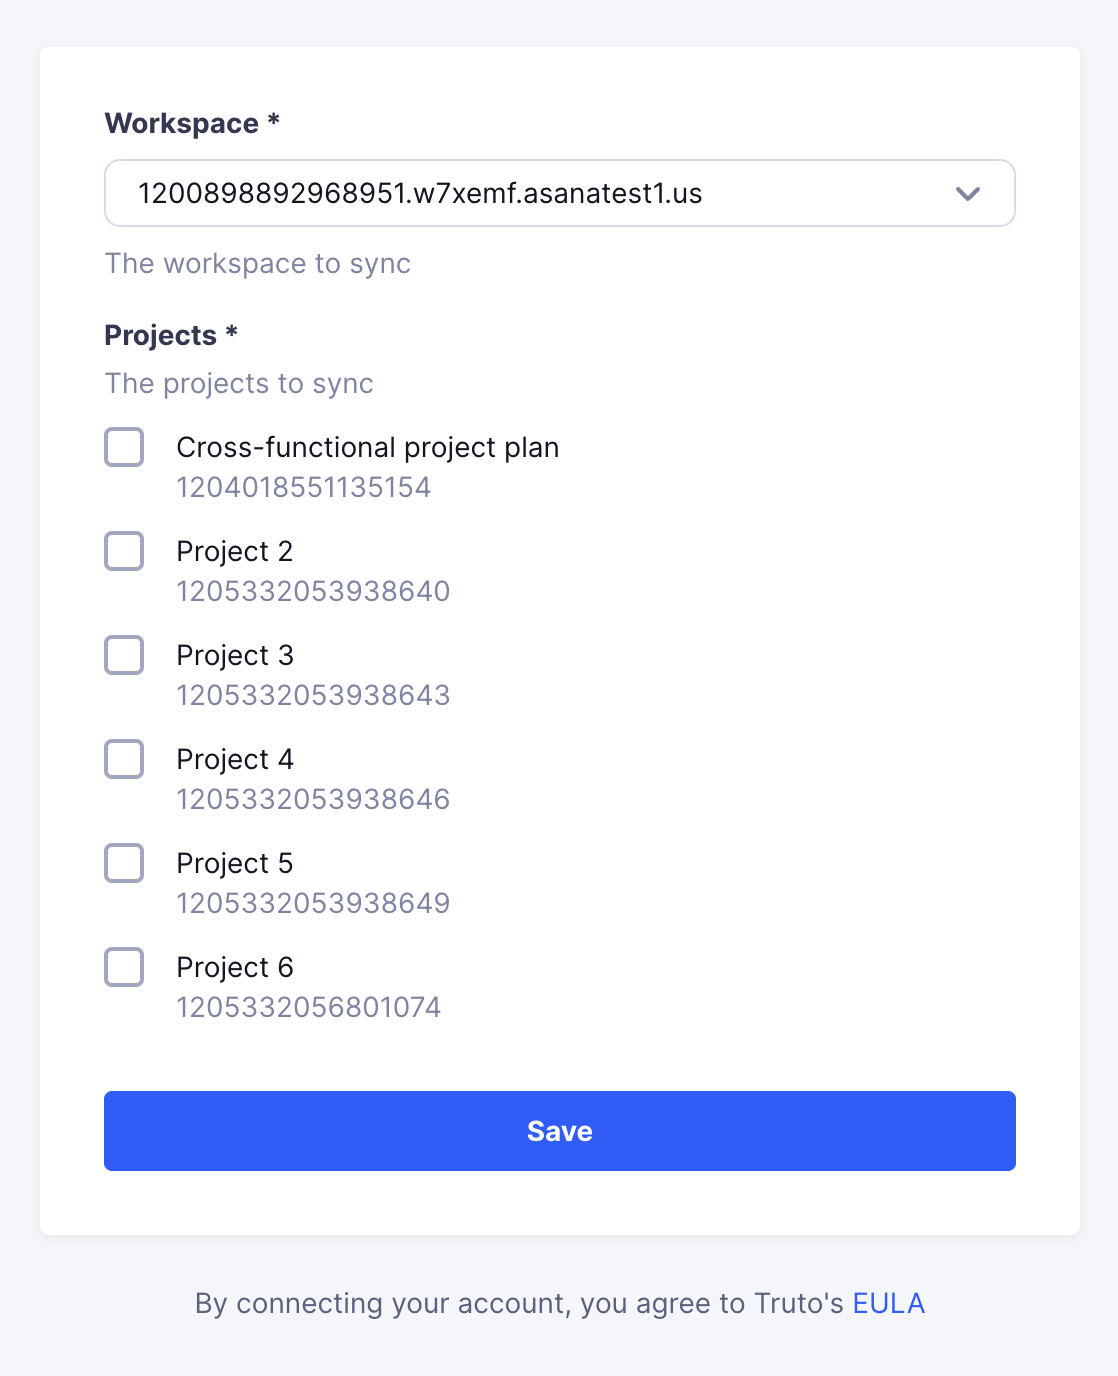
- Projects Populated: Once a workspace is selected, the Projects field displays the first page of projects related to that workspace.
- Pagination Support: Users can click "Load more" to fetch additional projects if there are more than can be displayed initially.
Variables Captured
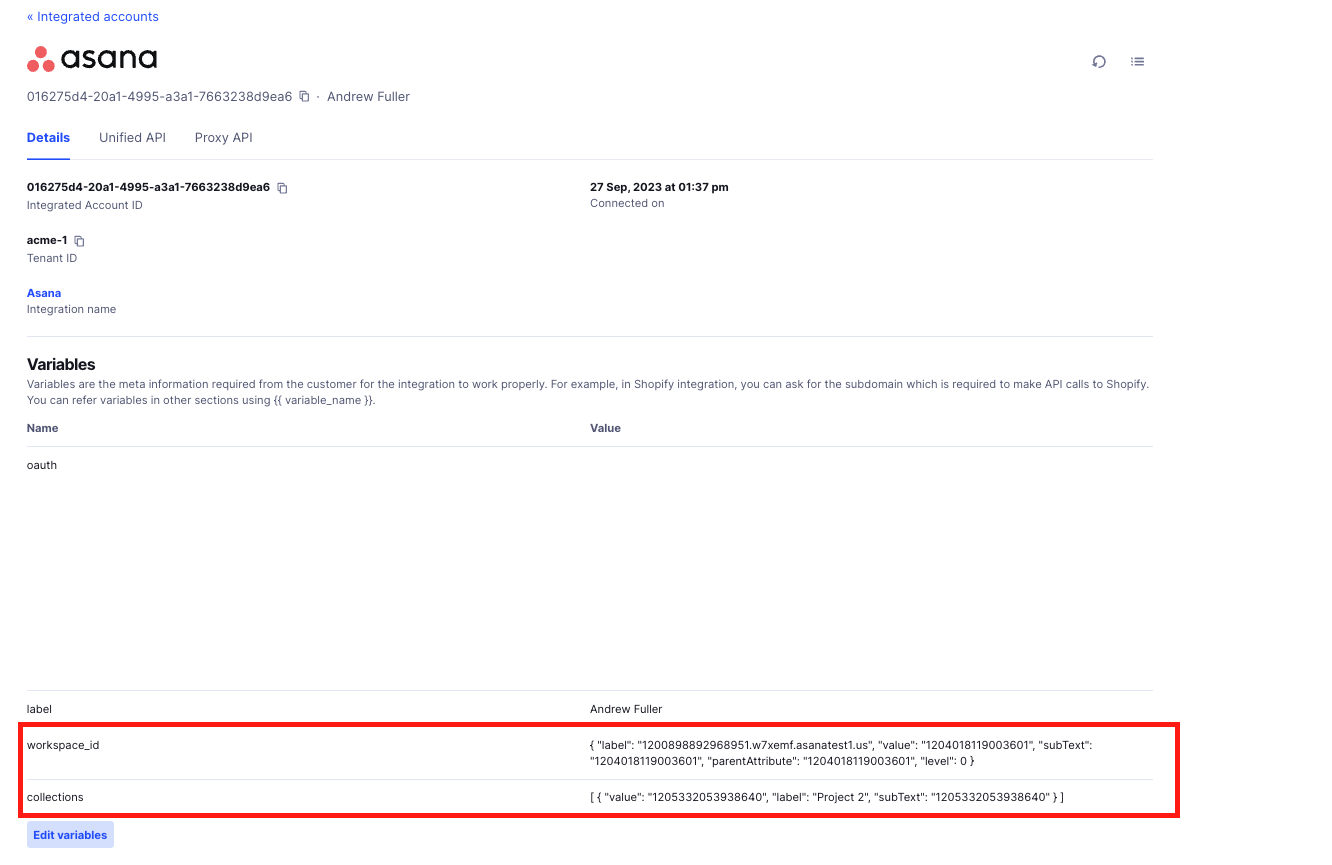
- Workspace ID and Projects: The selected values are stored and can be accessed in the Variables section of the integrated account.
- Usage in Sync Job: These variables (
workspace_idandprojects) can be used in your Sync Job configuration to customize the data synchronization process.
Next Steps
By following these steps, you've created a user-friendly RapidForm that dynamically interacts with user input, enhancing the integration experience. If you need further assistance or want to explore more features, refer to the Field Types for additional guidance.

